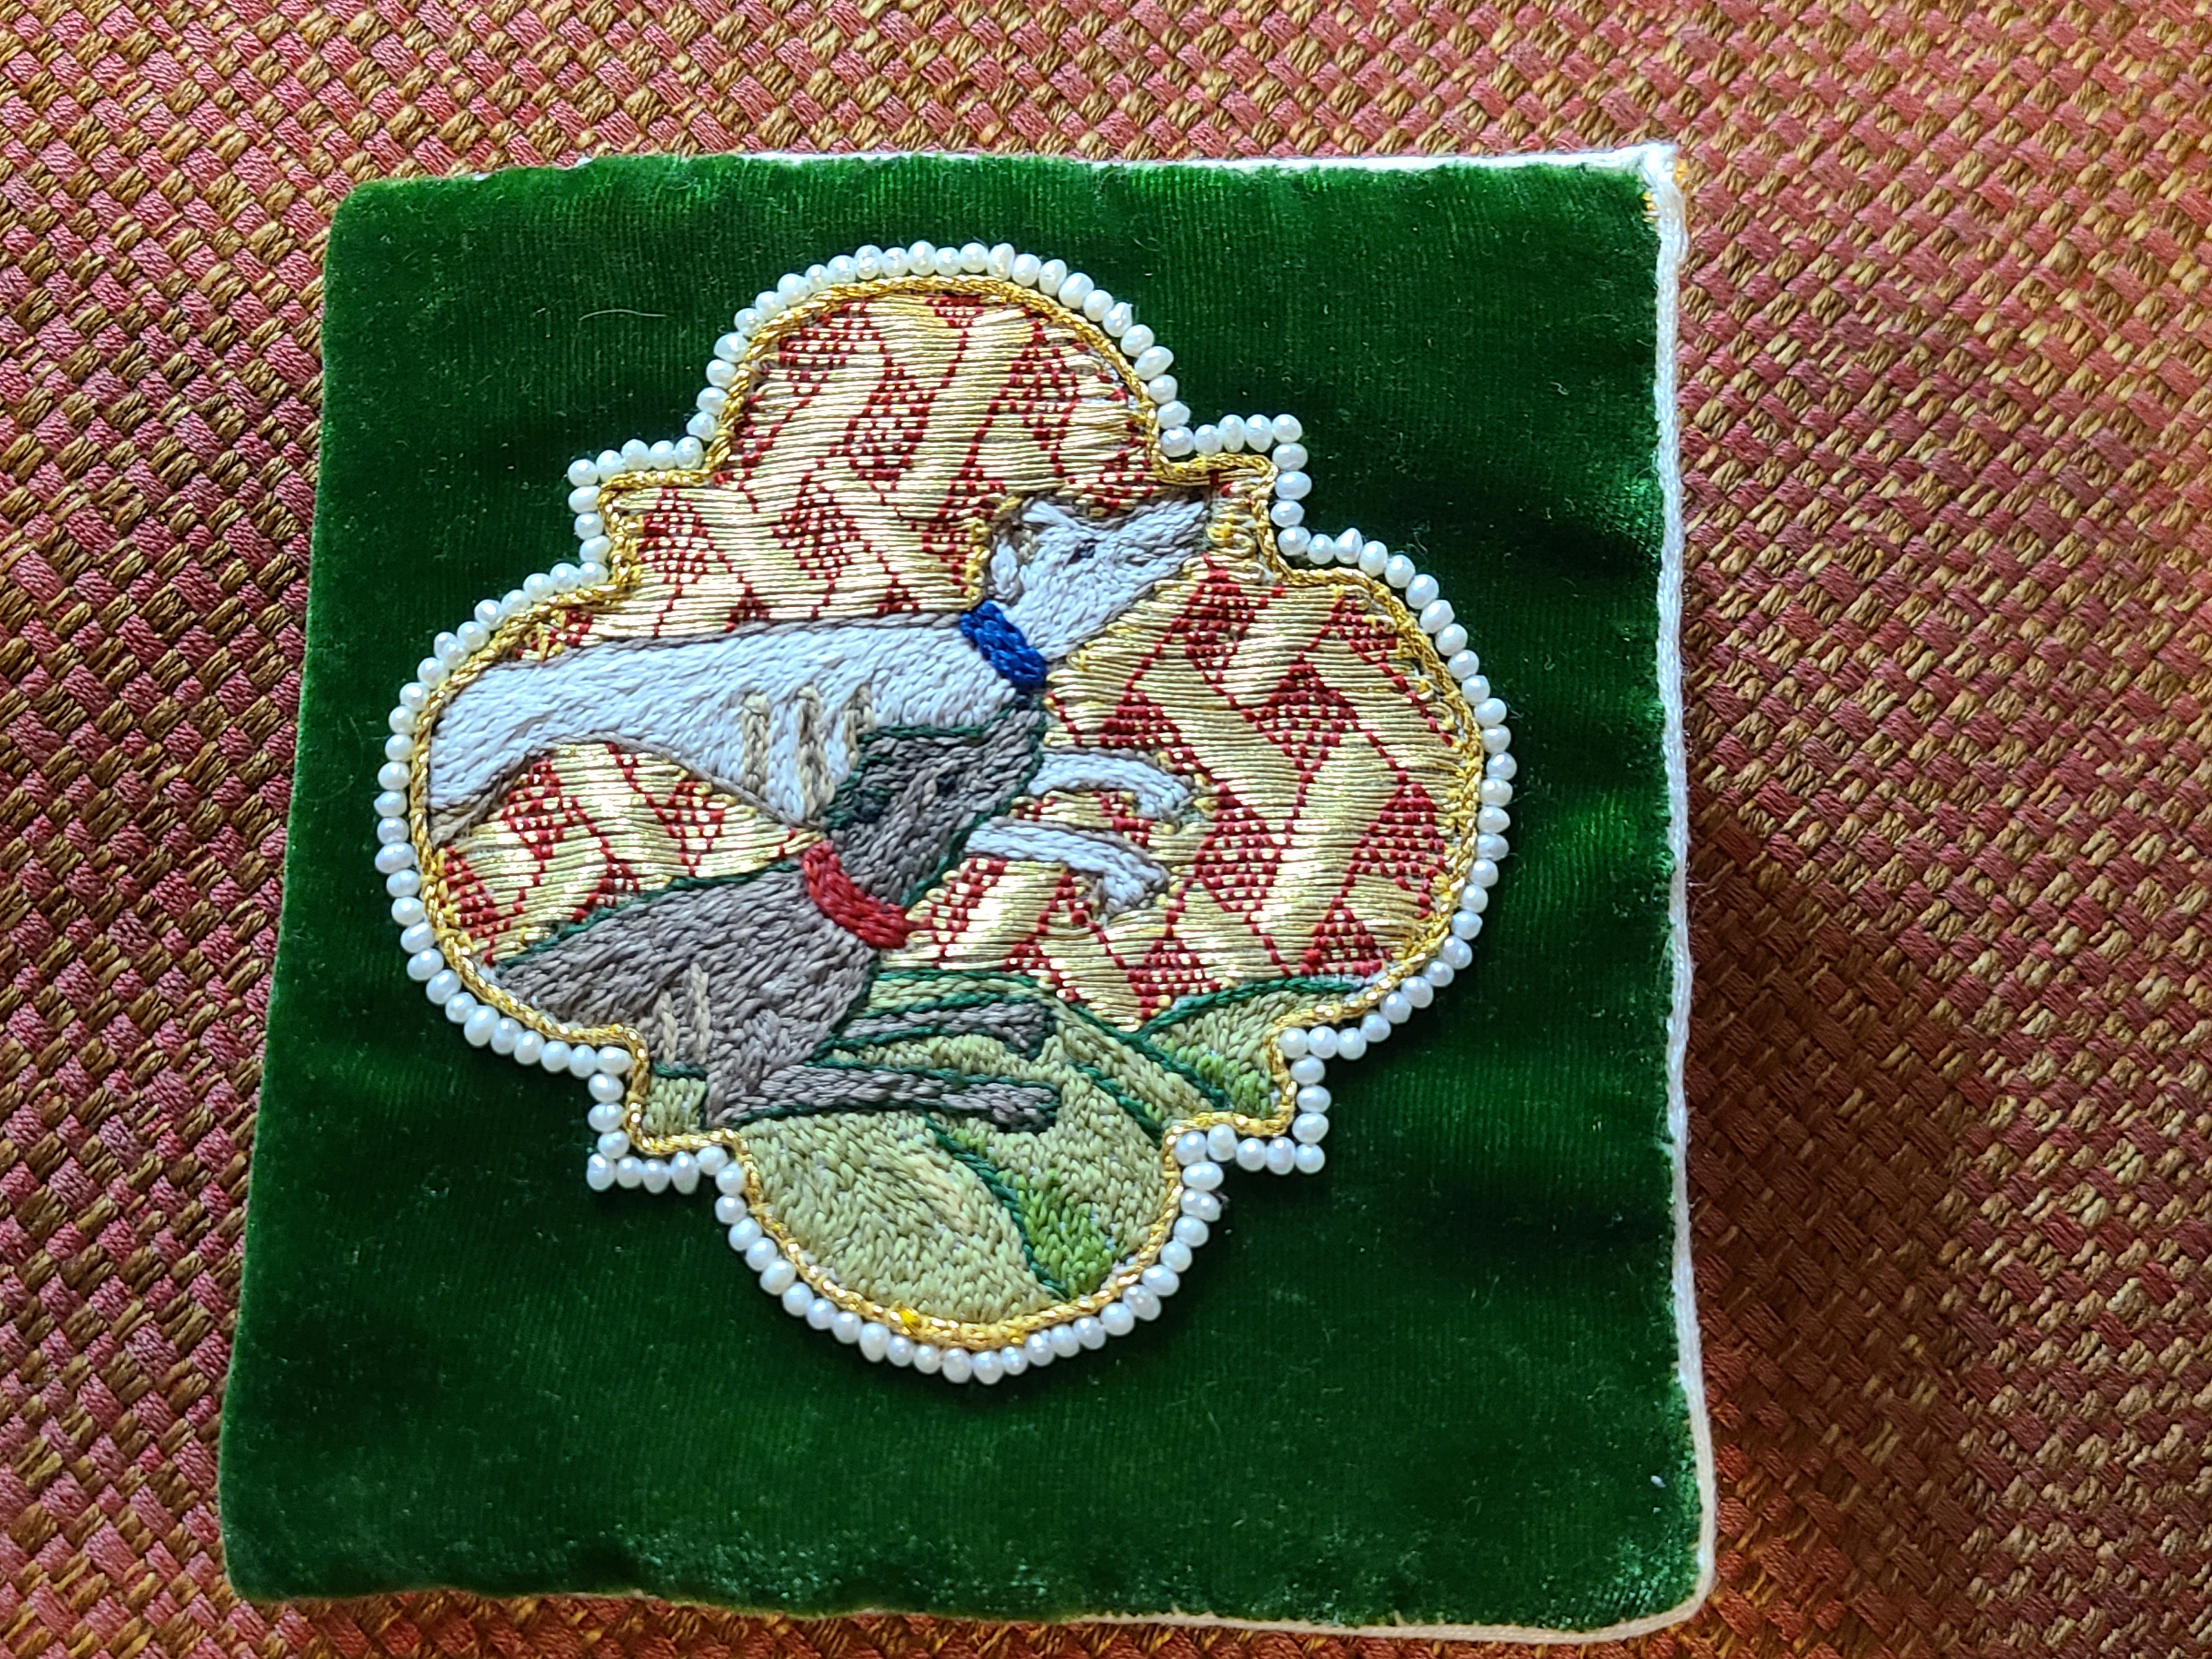
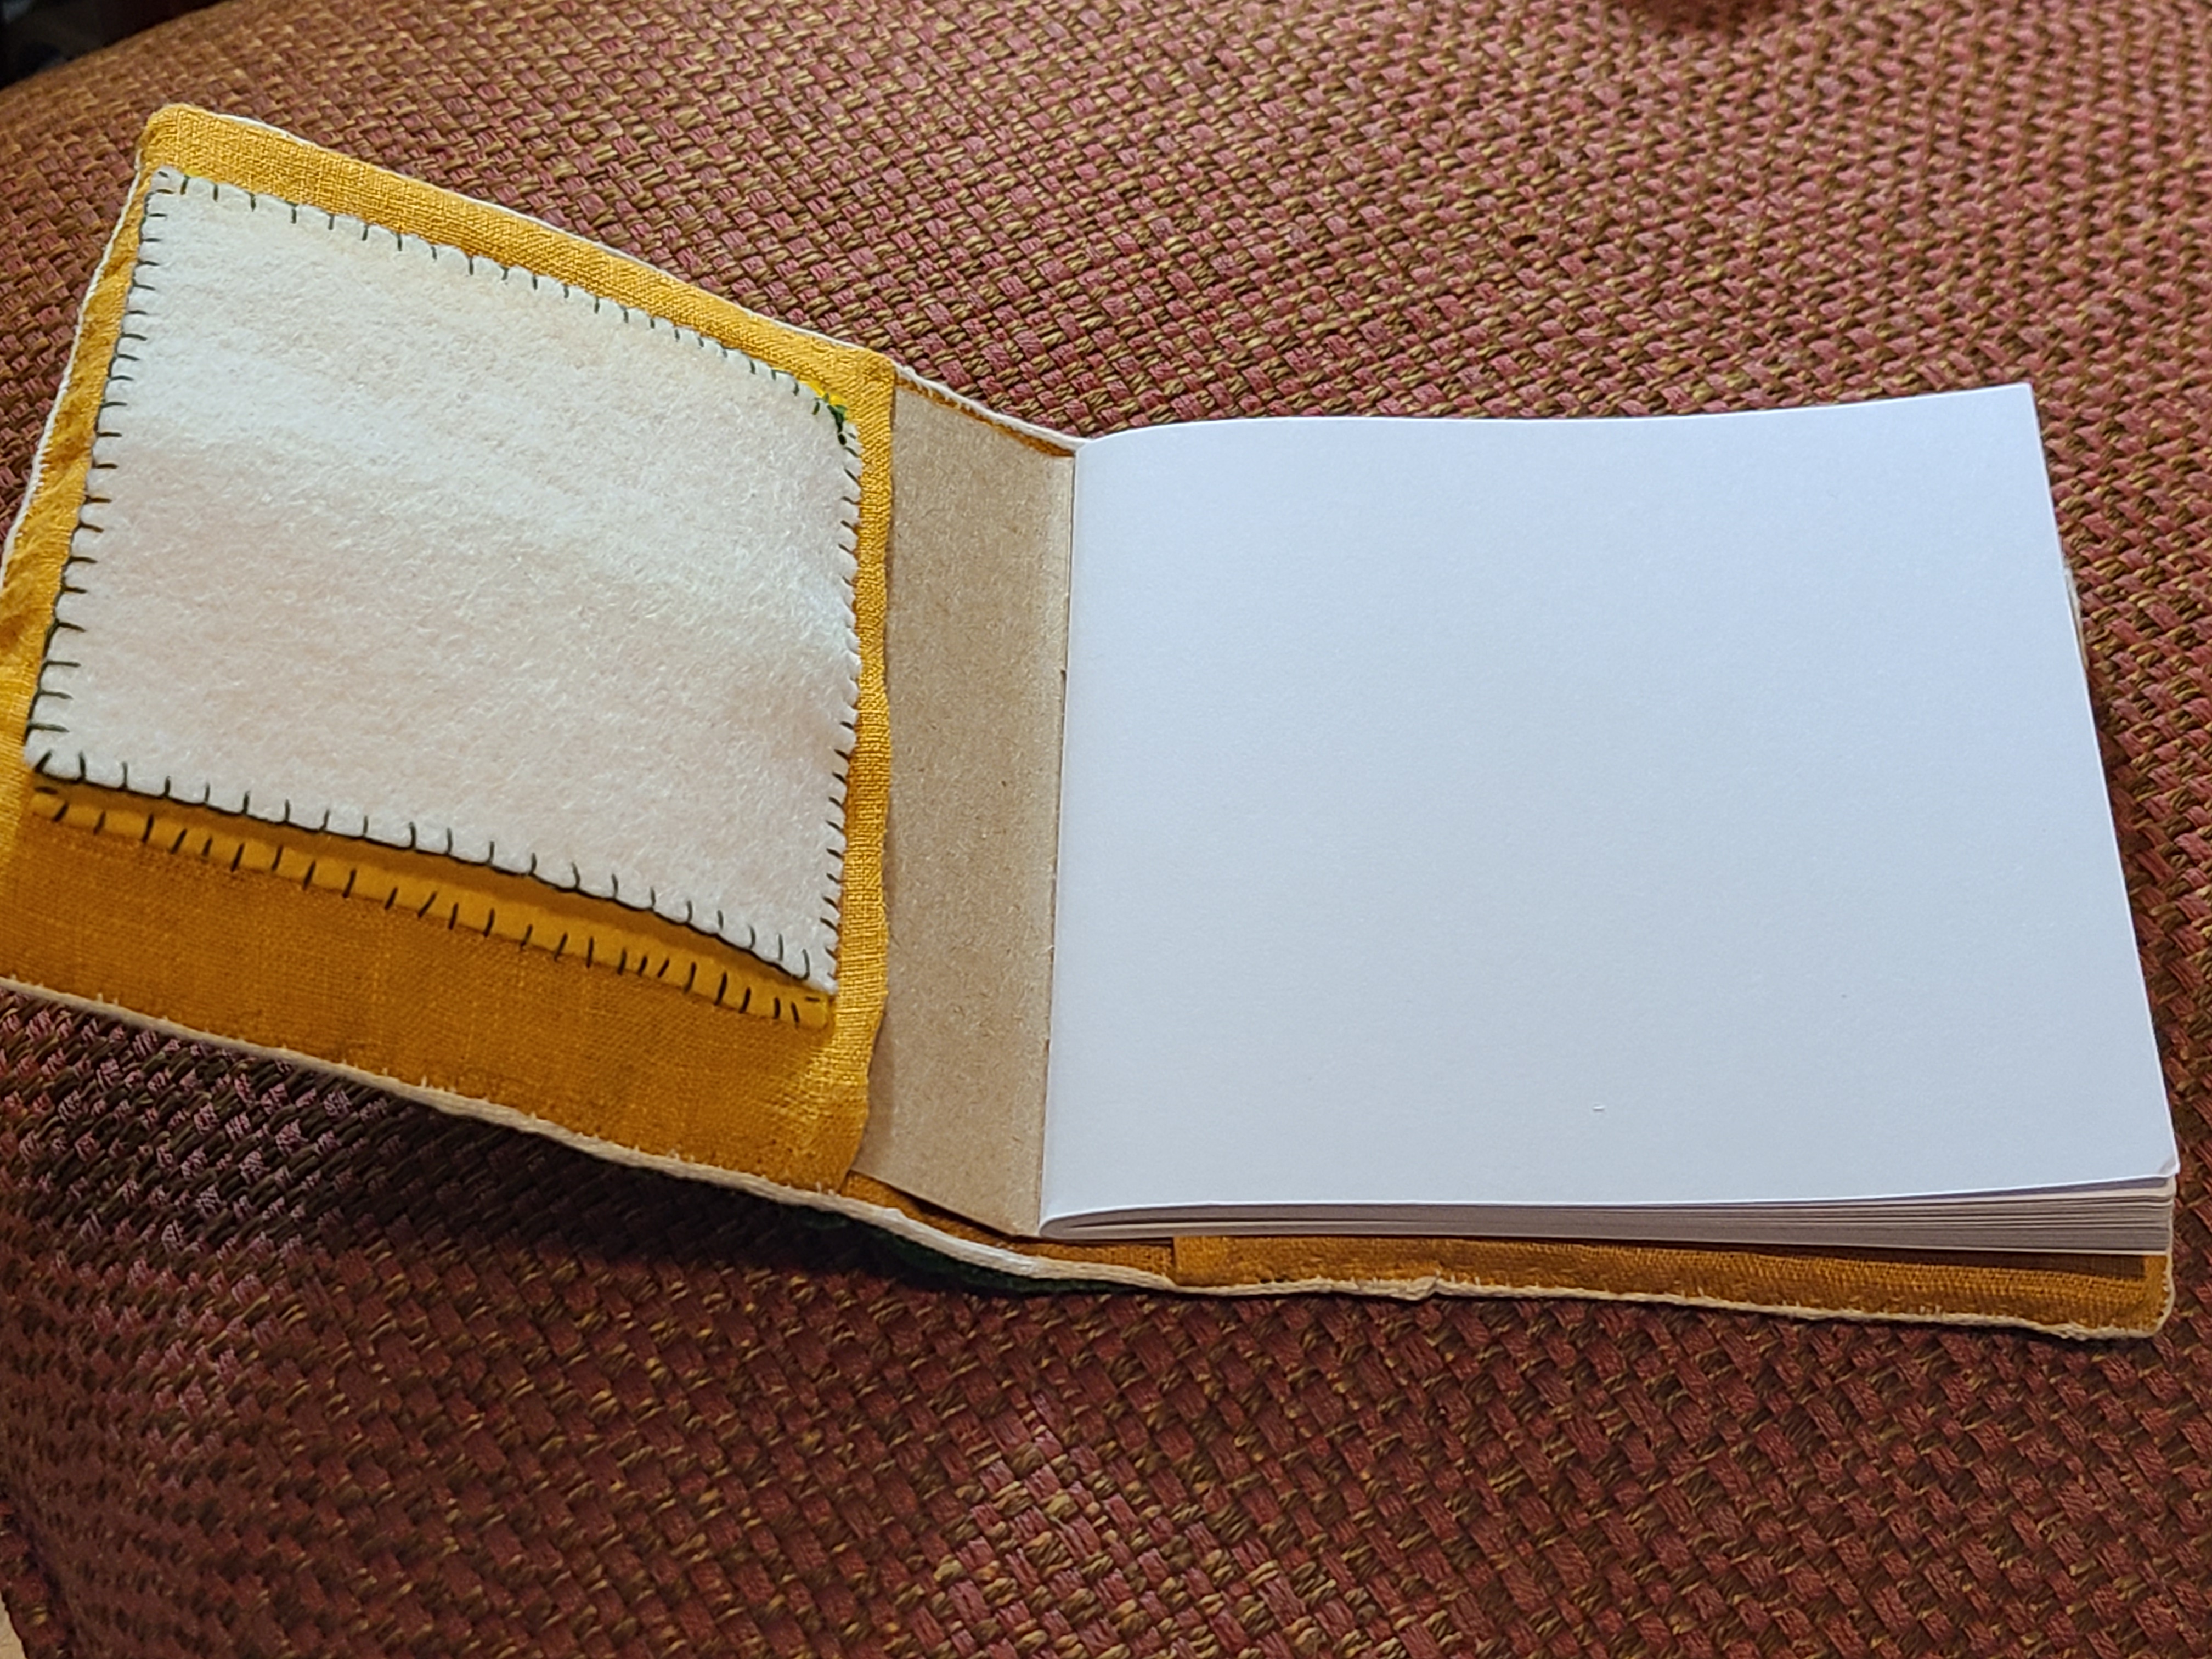
I entered a gift exchange and wanted to make something that was both useful and had a personal connection to the recipient. First I needed to do a little research. I needed to know a little more about the recipient, and then to research the design itself. I learned he owned a pair of beautiful greyhounds, and I immediately thought of the “Hunting Book of Gaston Phoebus”. I decided to do a goldwork embroidery with greyhounds worked into the design. Since the recipient also embroiders, a needlebook for an embroiderer sounded useful. However, needlebooks tend be rather small, so, to accommodate the design, it became a 4 inch mini notebook with a needlebook tucked into the front cover, in order to fit the design.
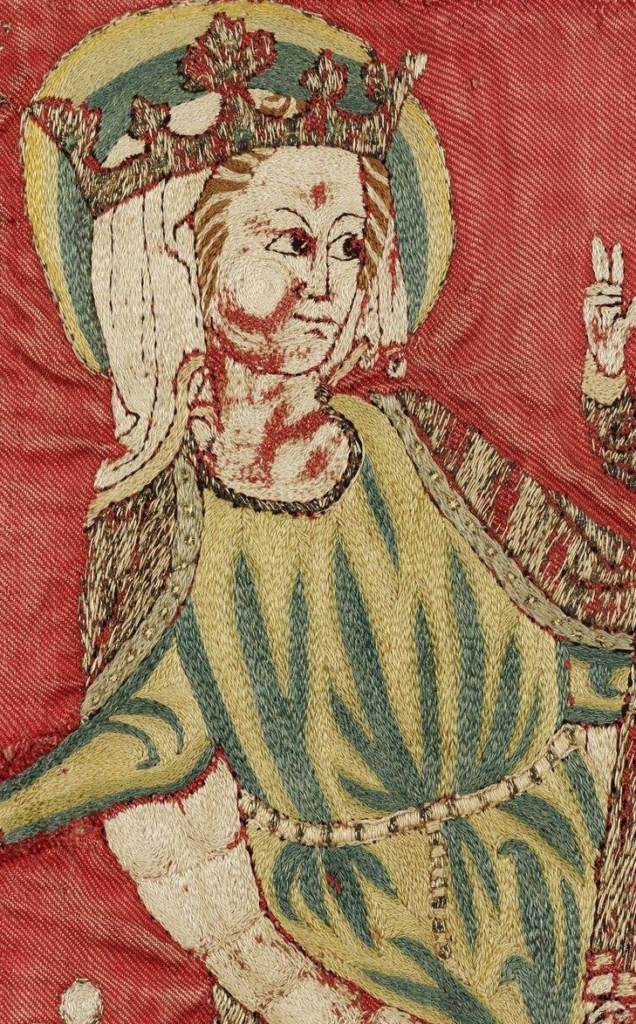
I looked at styles of medieval goldwork to decide what would work best with this small item, so before making a drawing or deciding what style, I searched books I have including “English Medieval Embroidery: Opus Anglicanum”, and “Medieval Craftsmen: Embroiderers” for ideas. Opus Anglicanum, or English Work, was present for most of the medieval period, and encompassed several applications of metal thread to embellish embroidery. I was particularly drawn to a Flemish piece, though not English Work, it had a beautiful application of Or Nue technique (see photo below of the Annunciation, which is at the Met in New York).
Opus Anglicanum is the Latin for English work. It was the term used to describe a form of medieval embroidery that was highly recognizable to the people of medieval Europe. There are many references to Opus Anglicanum in inventories, fiscal accounts, correspondence, and histories during the time of its production (Browne, et al 1). The work was recognizable to the viewer as a style of goldwork embroidery that combined fine split stitch silk thread with couched metal thread to create images that captivated the viewer, and was “known throughout Europe for its quality” (Browne, et al 1). Today we have a number of extant pieces, but they represent only a small number of what we know was actually produced.
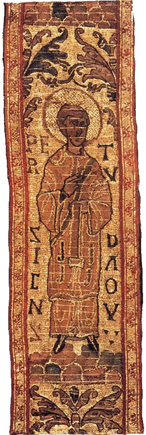
Opus Anglicanum was produced from as early as the 9th century with St Cuthbert’s stole (Browne, et al 2) to as late as the early 16th century with the Fishmonger’s pall dated to early 16th century (Browne, et al 272). (pictured: St Cuthbert’s Stole at Durham Cathedral: Object numberDURCL : 5.4.59)
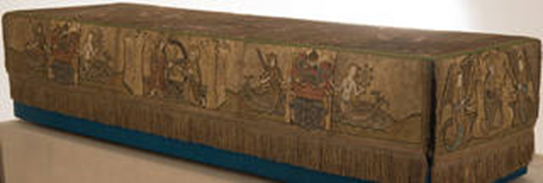
1512 – 1538, England. © The Worshipful Company of Fishmongers, London (https://www.vam.ac.uk/articles/medieval-mythologies)
The most renowned period of this embroidery would be the 12th to mid-14th century when underside couching was employed in a large number of pieces, and became a defining characteristic of English work. English Work was used to decorate “seal bags, book covers, cushions, clothing, large wall hangings, bed hangings, horse trappings, and banners” (Browne, et al 7)
So, what exactly is that style? Opus Anglicanum combines colored silk thread using split stitch and stem stitch to create figures, pastoral scenes, heraldic motifs, and other designs, with couched metal thread. These designs frequently use gothic architectural frames like quatrefoils or arches to frame the subject (Owen-Crocker, et al 395). They changed over the centuries of production by adding underside couching of metal threads, then later moving away from that technique to the use of Or Nue, a shaded surface couching technique. Another change was seen in how the ground was covered with embroidery. Early examples covered all of the ground fabric, then in later examples you see the use of expensive ground fabrics such as silk velvet being allowed to show through the embroidery. The later method certainly saved time, but may have been cost saving as well. Seed pearls were often used to both outline and to fill design elements (Browne, et al 12).

A Flemish example of Or Nue, The Annunciation. This is from the mid 15th century. There is no underside couching on this example. Browne et al explains “although underside couching was of enormous importance to the final appearance of English embroidery, this was only one of among several techniques available….” (Browne, et al 4) https://www.metmuseum.org/art/collection/search/466182 Accession Number: 1990.330
The silk thread embroidery was done with great attention to detail where the appearance of folds in fabric or the shape of a face, comes alive by using shades of the same color to provide shadow and highlight, or changing the direction of the line of stitching. Split stitch in particular was used to great effect for creating curves, and following the lines of draping garments (p.35, Staniland). To get this level of quality and detail, most Opus Anglicanum were produced in workshops by professional embroiderers. There were some pieces created by nuns, including one that signed her work, Johanna of Beverlai (p.396, Owen-Crocker, et al).
Next in the design process was to choose materials. In period this included silk thread, metal thread, linen thread, linen fabric, silk fabric, velvet, and wool fabric, as well as pearls and other gems were used to create these amazing textiles. The silk thread was flat having little or no twist to it, and created designs using primarily split stitch and stem stitch. The metal threads, sometimes called filé, early on were made from high quality gold, but gave way to thin strips of silver gilt wrapped around a silk core. Other cores types have been found including gut wrapped with gilt tin strips, but silver gilt with a silk core was more common (p10, Browne, et al). Often the silk core of metal threads was yellow, but colored cores are also found, particularly later period when underside couching is giving way to Or Nue. Linen thread was used for underside couching. Ground fabrics used depended on whether the entire ground would be covered in the embroidery which was very expensive, particularly if a large portion was made of the metal threads. If this was the case, linen was often used for the ground fabric. If some of the ground was to show then you would find silk twills, very often dyed with an expensive red dye (p7-8, Browne, et al). When velvet became readily available, these embroideries were done on beautifully colored velvets, with expensive red being the favored color, and less of the ground was covered in the even more expensive metal thread. Seed pearls were an especially popular embellishment for English Work, with massive amounts being sold by weight to England during this time (Browne, et al 12).
Now that I had a general style, and I knew what type of materials would be needed, I was ready to create the design. I also did a cursory search for how they developed design in the middle ages. I could find little information of any differences from early period to the methods we do have documentation for in later period. Browne, et al discusses the evidence for artists, rather than embroiderers, creating the design, and the great similarities found between contemporary art and embroidery. “Designs for luxury embroideries were closely related to images produced in other media.” (Browne, et al 61).
Ceninno Ceninni wrote a book on techniques for artists, dated early 15th century. He tells us that artists are often called upon to create the art (or pattern) for an embroidery, then discusses techniques for placing that ‘pattern’ onto the fabric to be embroidered. Cennini discusses a variety of techniques which may be better explored in a project that is specific to the transferring of designs. However, the short version is that he discusses inking the design directly onto the fabric, and then with velvet specifically suggests that you make the design onto white silk and have the embroiderer fasten that onto the velvet (Cennini) (Browne, et al 9) (Hermiole).
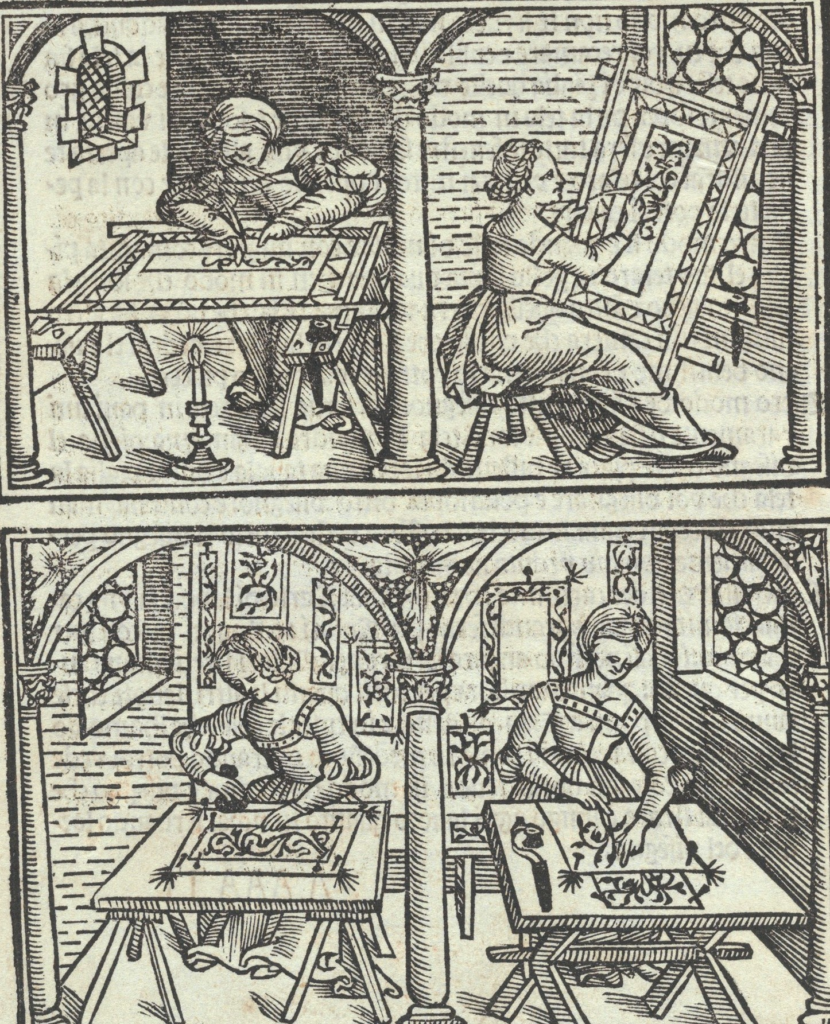
There is also a woodblock print that pictures four women placing a design onto fabric to be embroidered. The woodblock print has what appears to be two women using light shining through from underneath: one with a candle from underneath, and the other using the window, with the stretched fabric tilted to the light. One of the other women appear to be drawing the design on the fabric, and the last one using the prick and pounce method of transferring a design to the ground fabric.
I was fascinated by the different methods for transferring design to the ground fabric, but I did not have enough time to do the research and test sample pieces, and still manage to complete the gift on time, so this was a rabbit hole to saved for later.
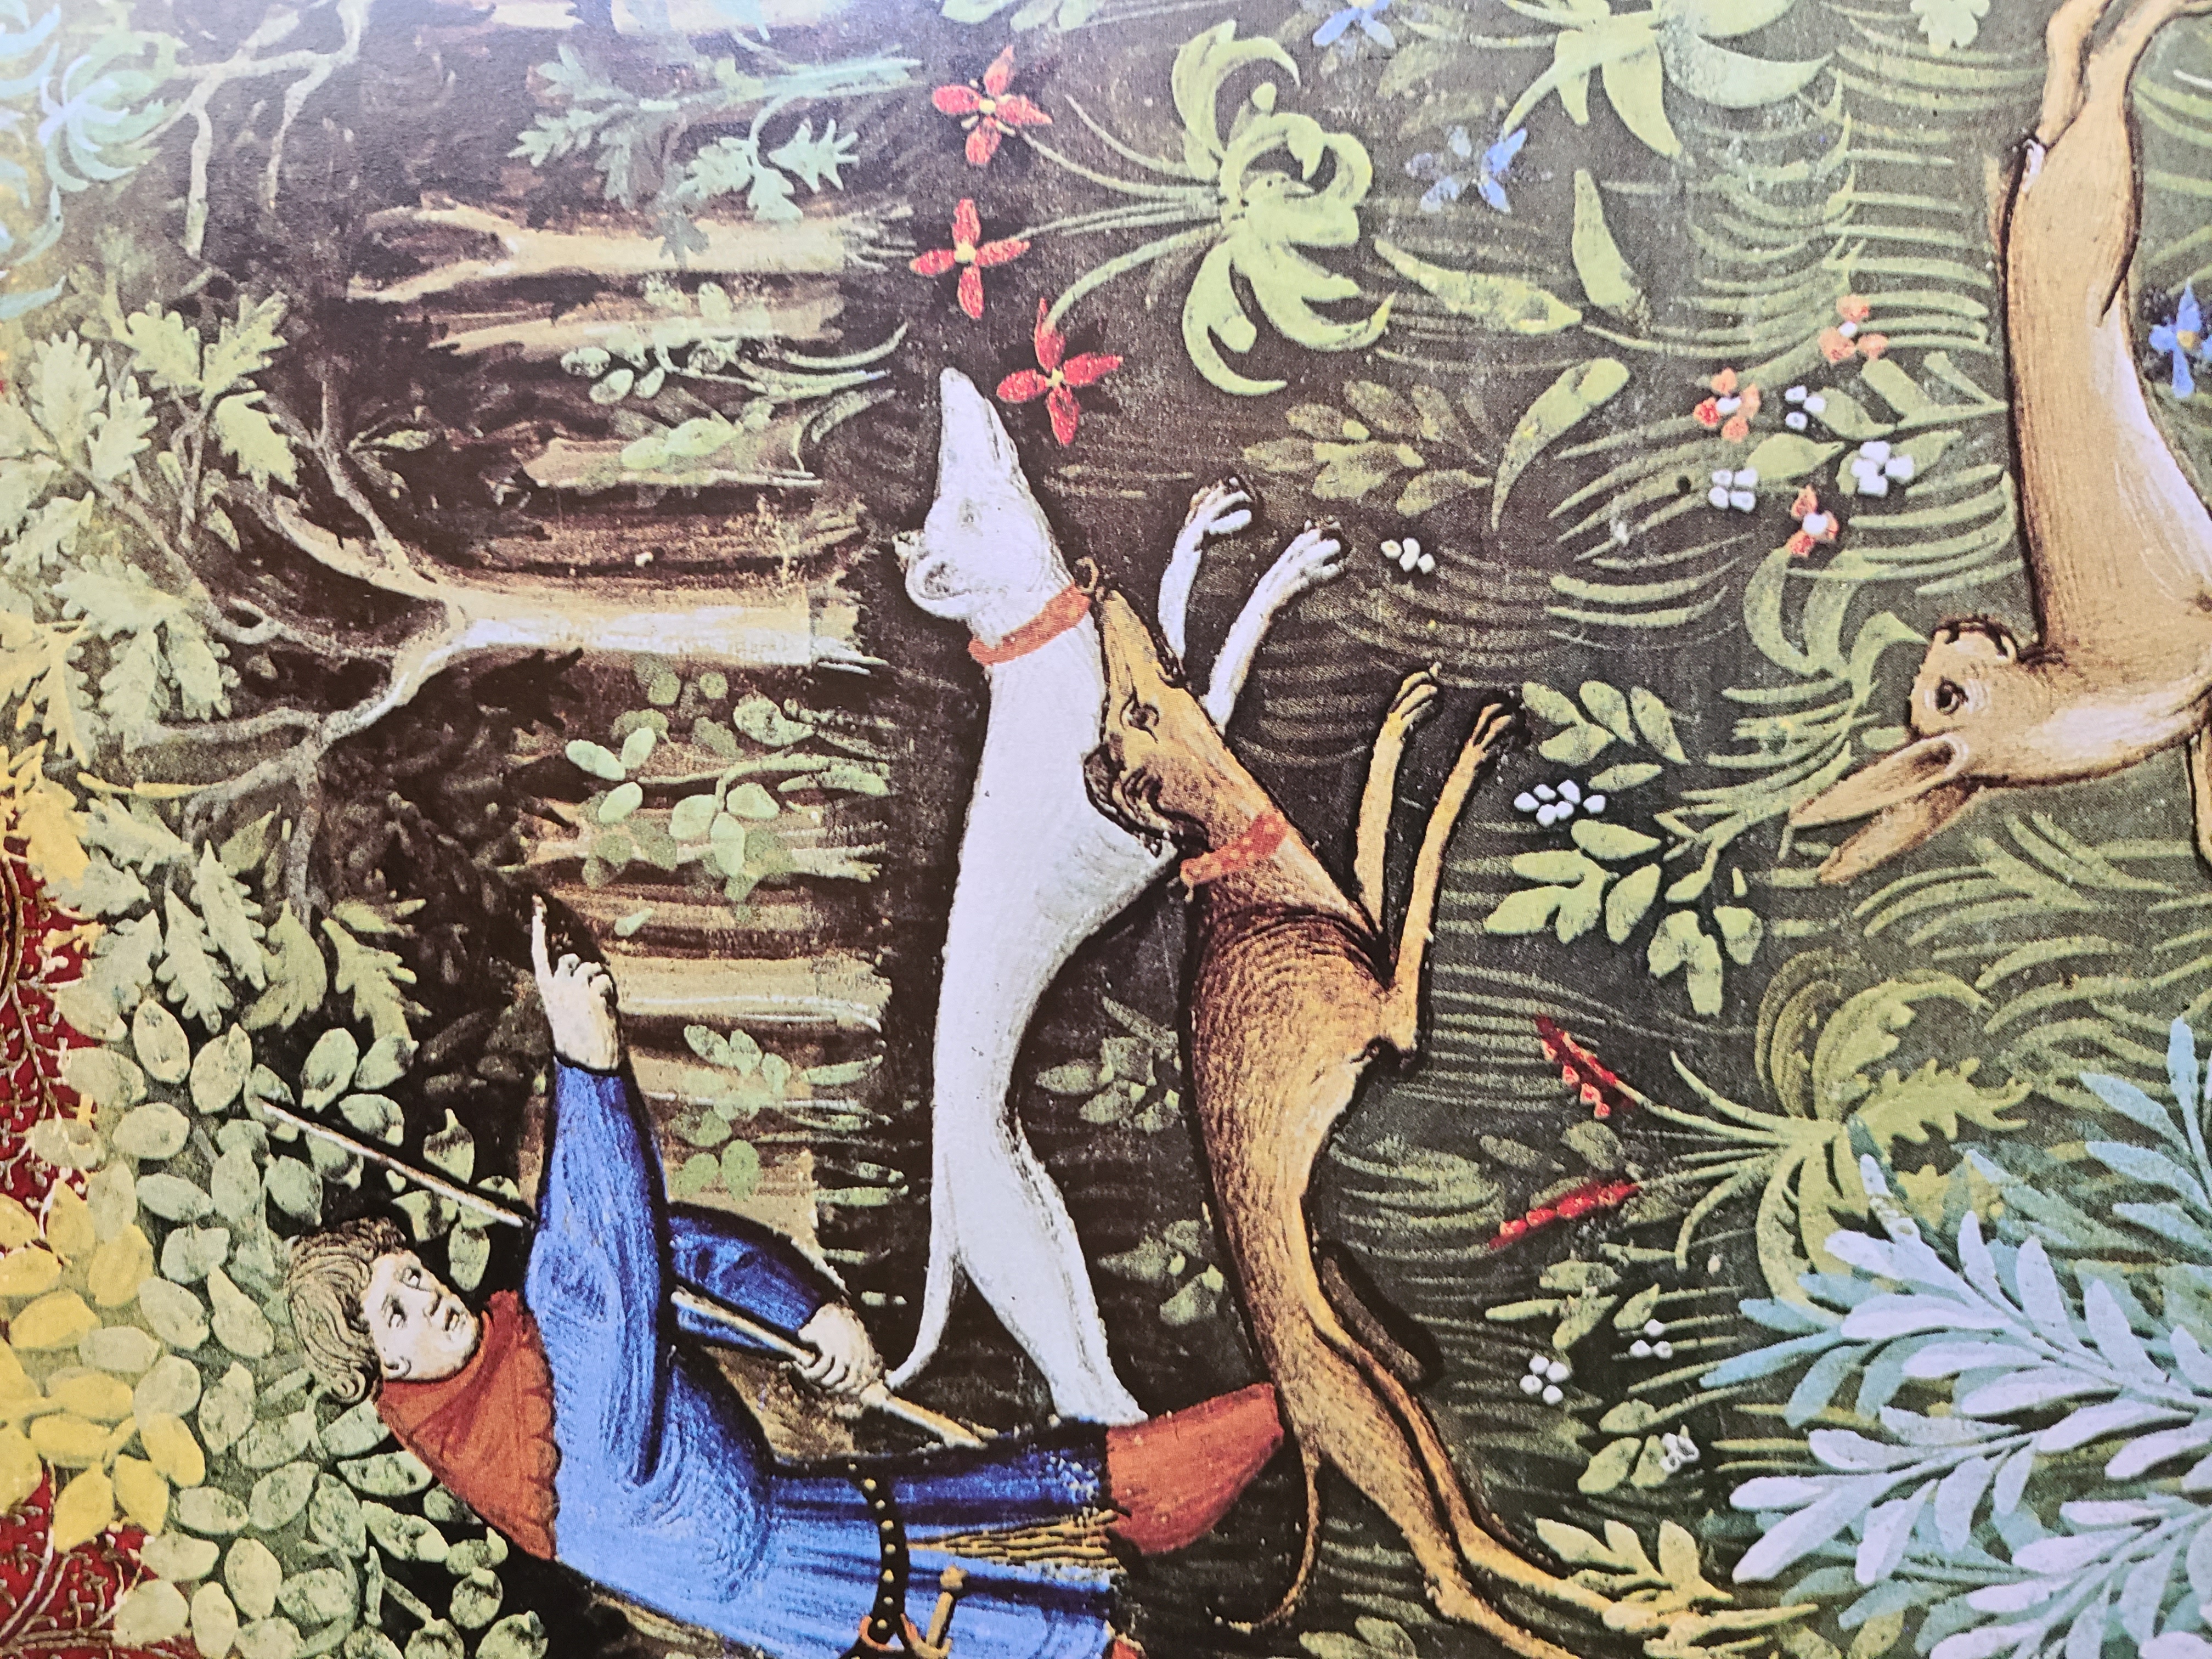
The Gaston Phoebus “Hunting Book” was my main inspiration for the design. I traced the greyhounds from this picture, as well s couple other pictures to look at while coming up with the design. These are the ones I used, as you see below.
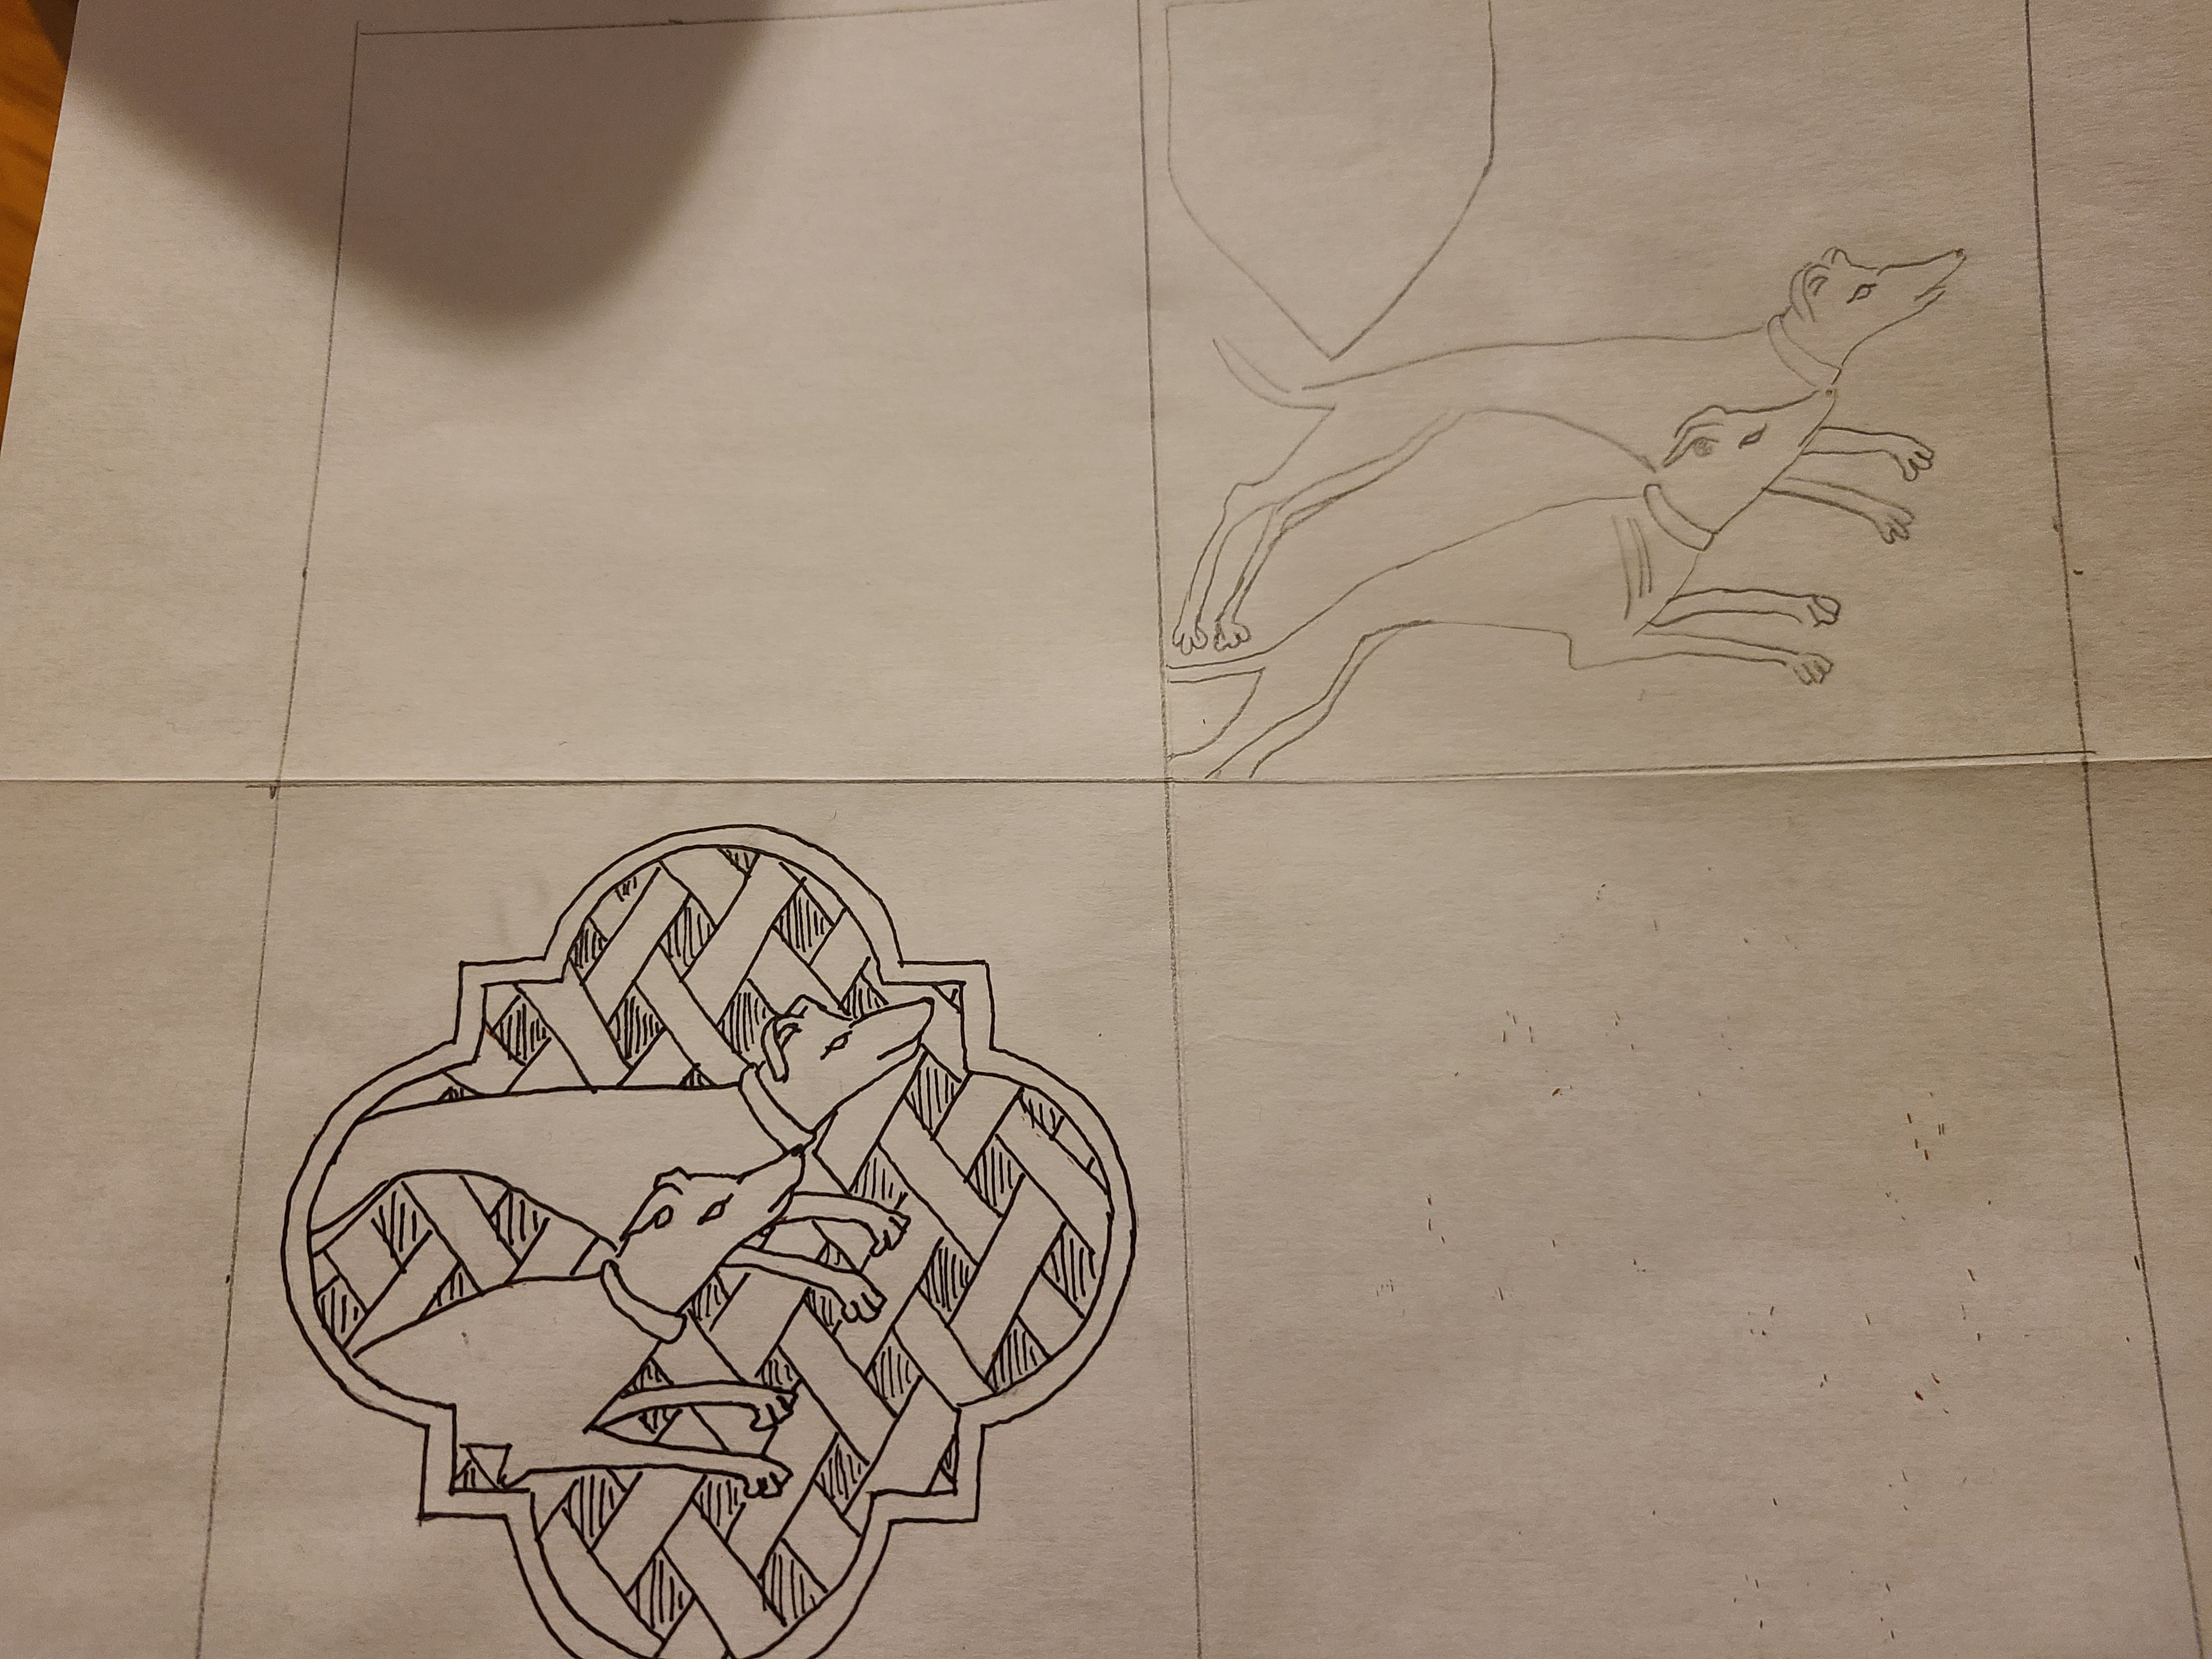
After I traced the greyhounds I needed to decide how to place them on the cover. I sketched a few ideas, then settled on the quatrefoil frame for a couple reasons. First, framing designs was was often seen in medieval art. Second, it gave me a specific area to fill, and last, I could use the edge of the frame to place other types of details into the work, such as the pearls that I eventually settled on.
I tend to do things like fold the sketch paper into quarters, which help me to see and draw the size of the project correctly. You can see in the corner of one square, I considered putting the recipients arms onto the design, before I eventually settled on the quatrefoil.
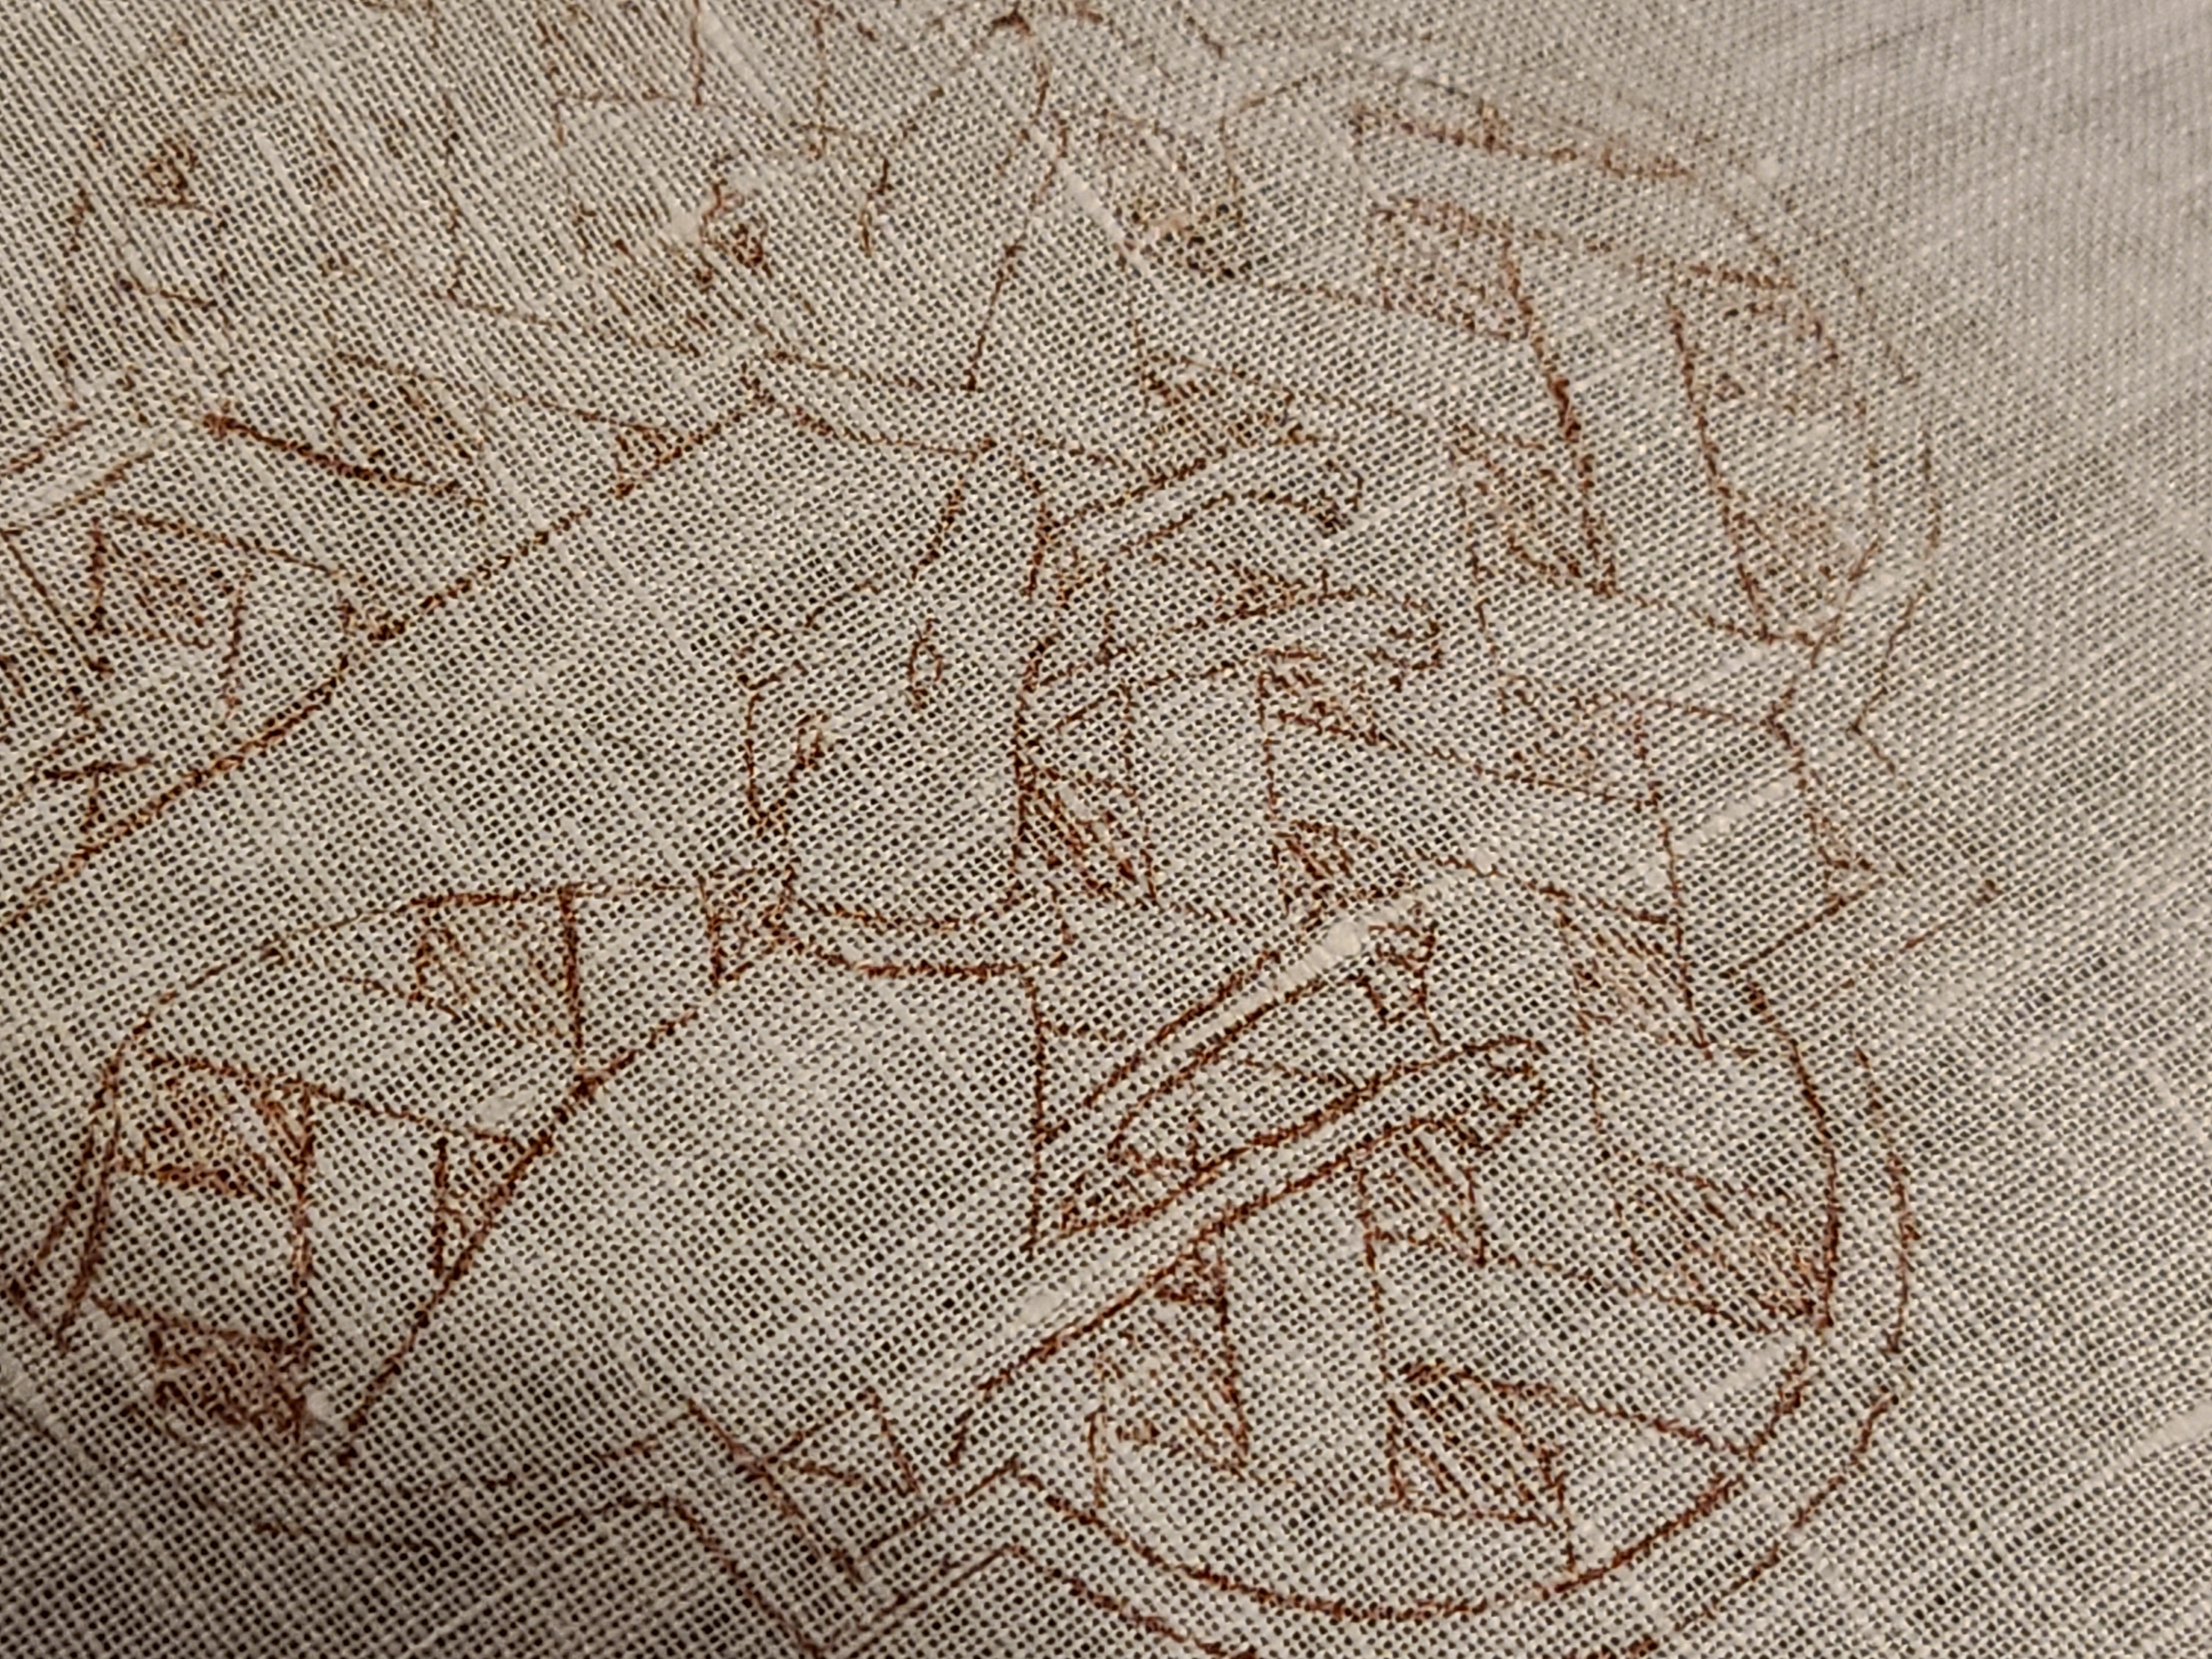
After settling on the design, sketching it out, then going over the paper sketch with black pen to make the lines as clear as possible, I then use a modern lightbox by placing the paper with the sketch on it, and taping the fine linen fabric down, so it does not move while transferring the design. Acid free light brown pen was used.
- Materials:
- Silk velvet (bleach and burn tested as at least natural fibers)
- #3 gilt passing thread
- 2mm freshwater pearls
- linen fabric lining
- Fine Linen as layer in embroidery
- 100% wool felt for needlebook portion
- silk thread for the embroidery
- Tablet woven edge 4 cards white silk
I already had most of these supplies, but needed to order tiny drilled pearls. That wasn’t problem though, because I wouldn’t need them for a few weeks, while most of the embroidery was completed.
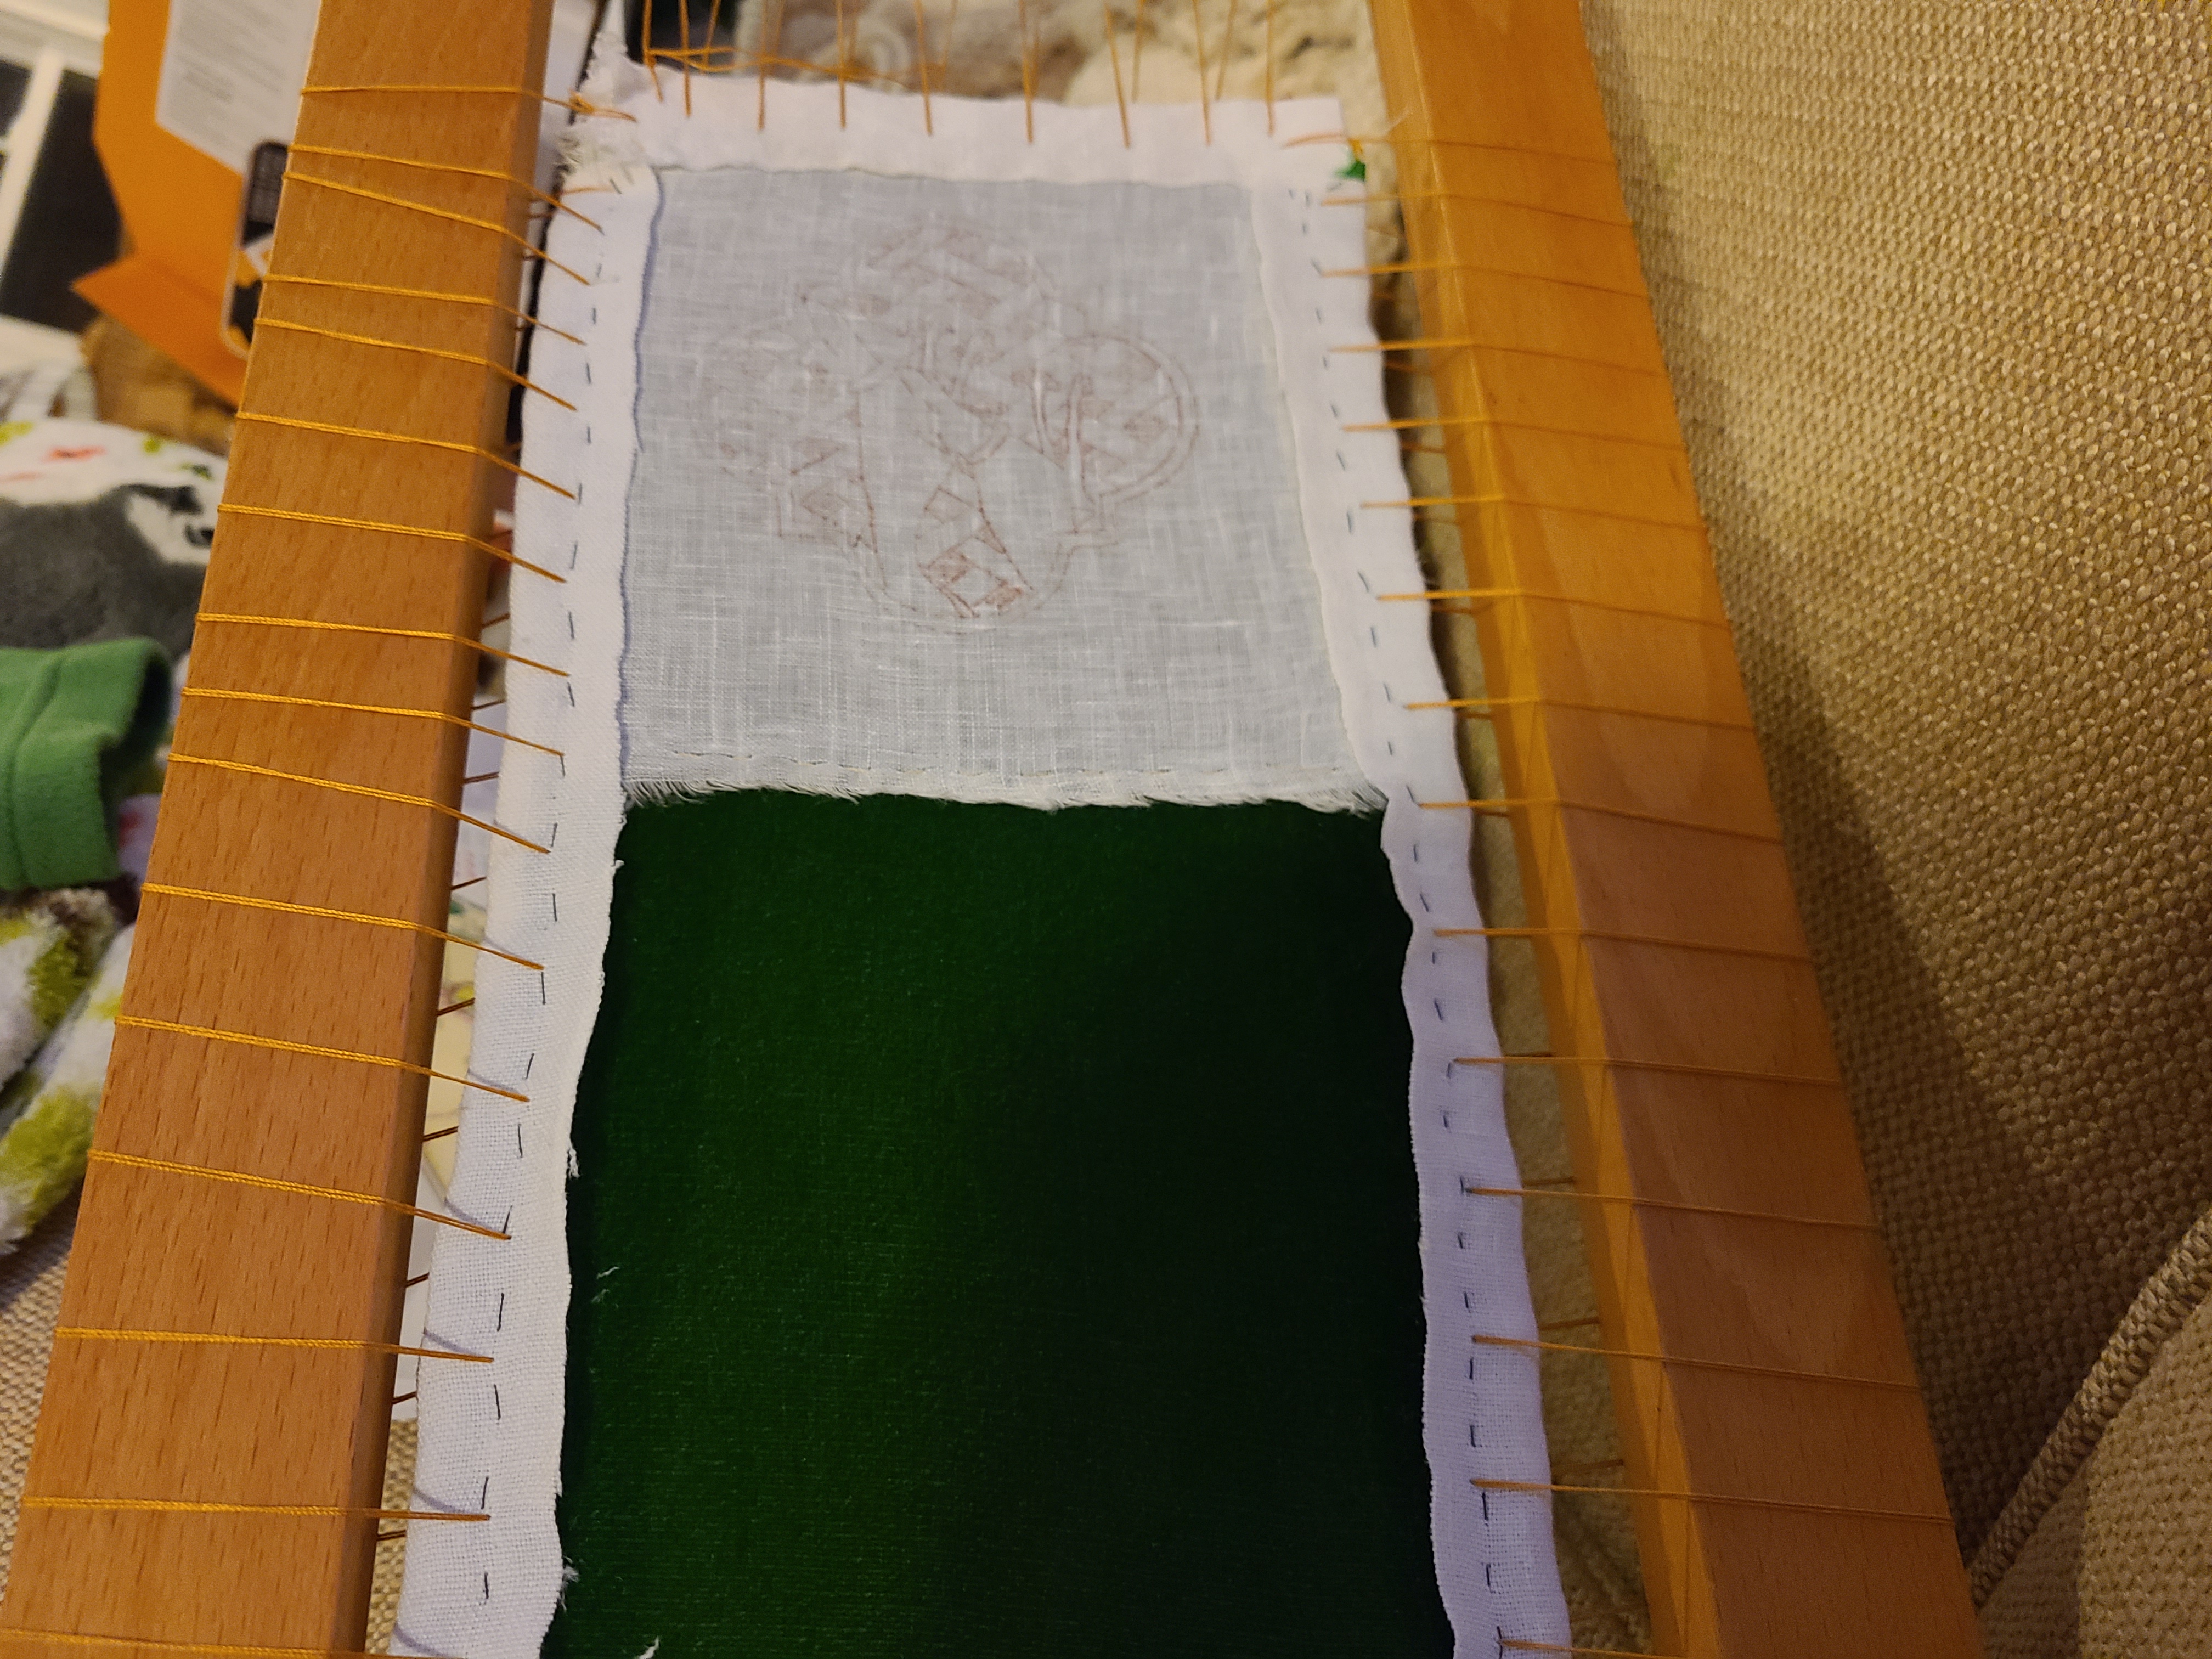
I thought I would try for the first time to use a medieval style embroidery frame. I first basted the linen with the design onto the silk velvet, then basted the same linen to back of the silk. Finally, I basted scrap linen around the edges of the project to have something to run the stitches through that provide the stretch on the frame.
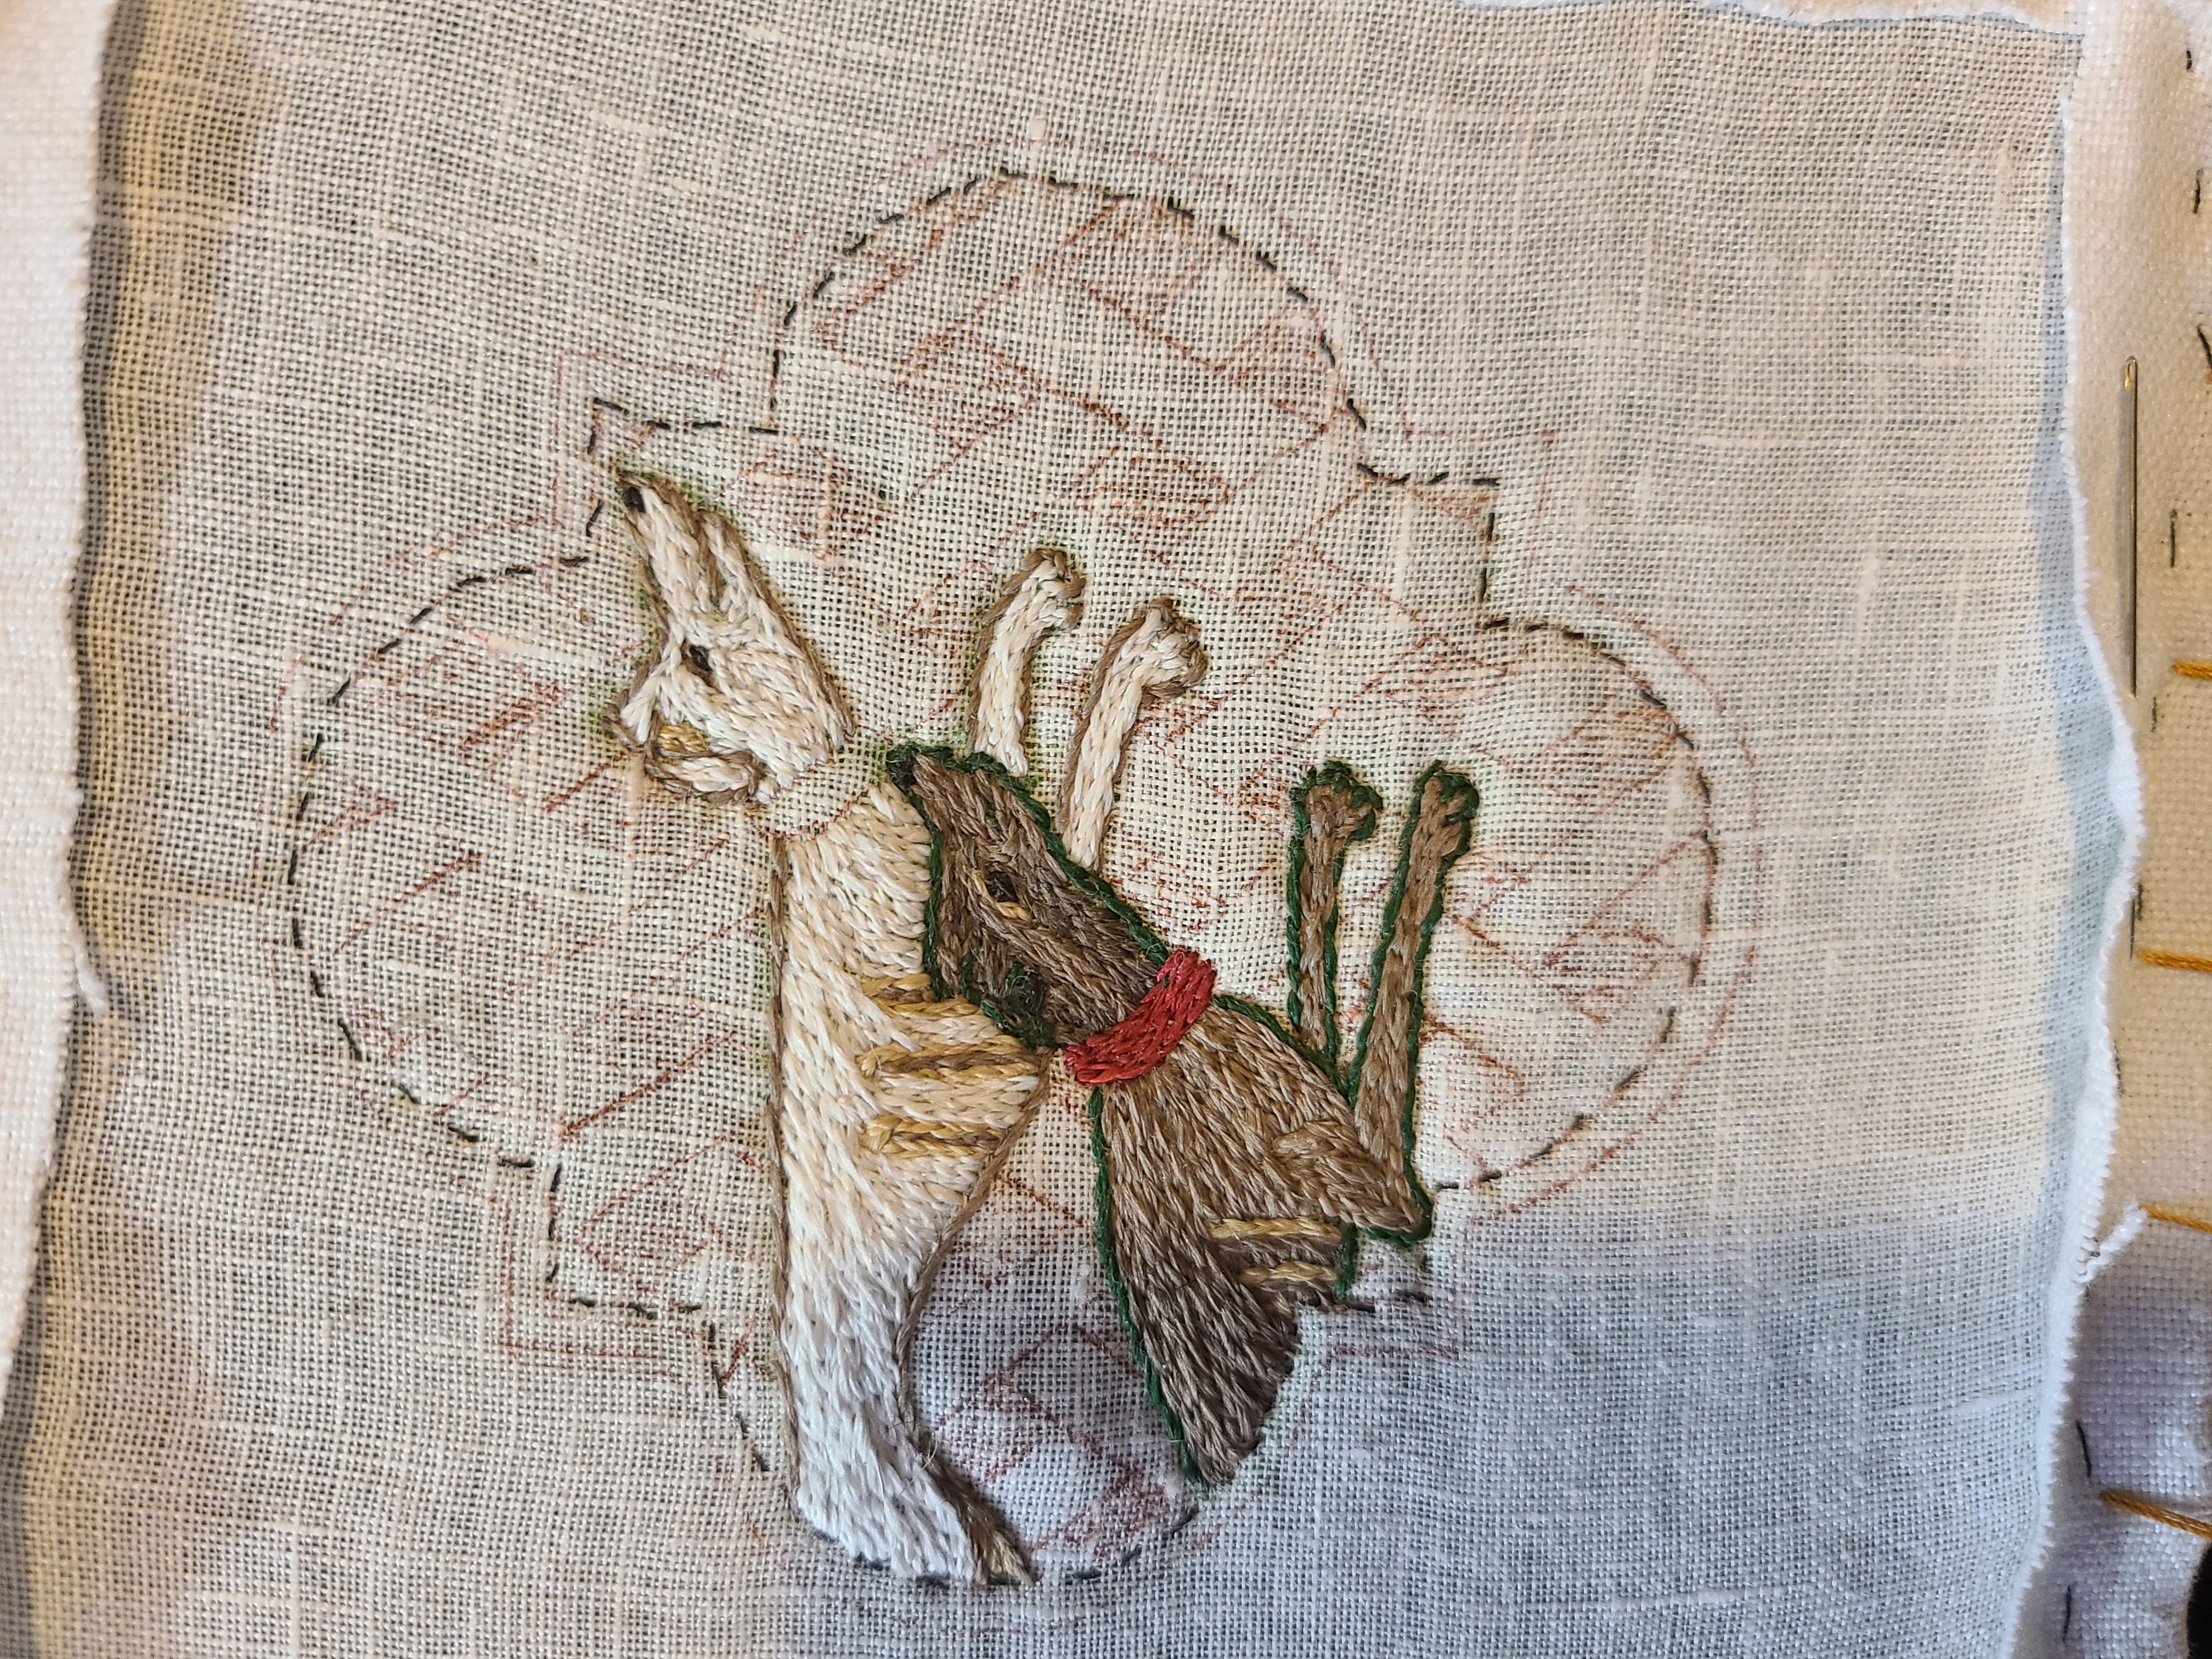
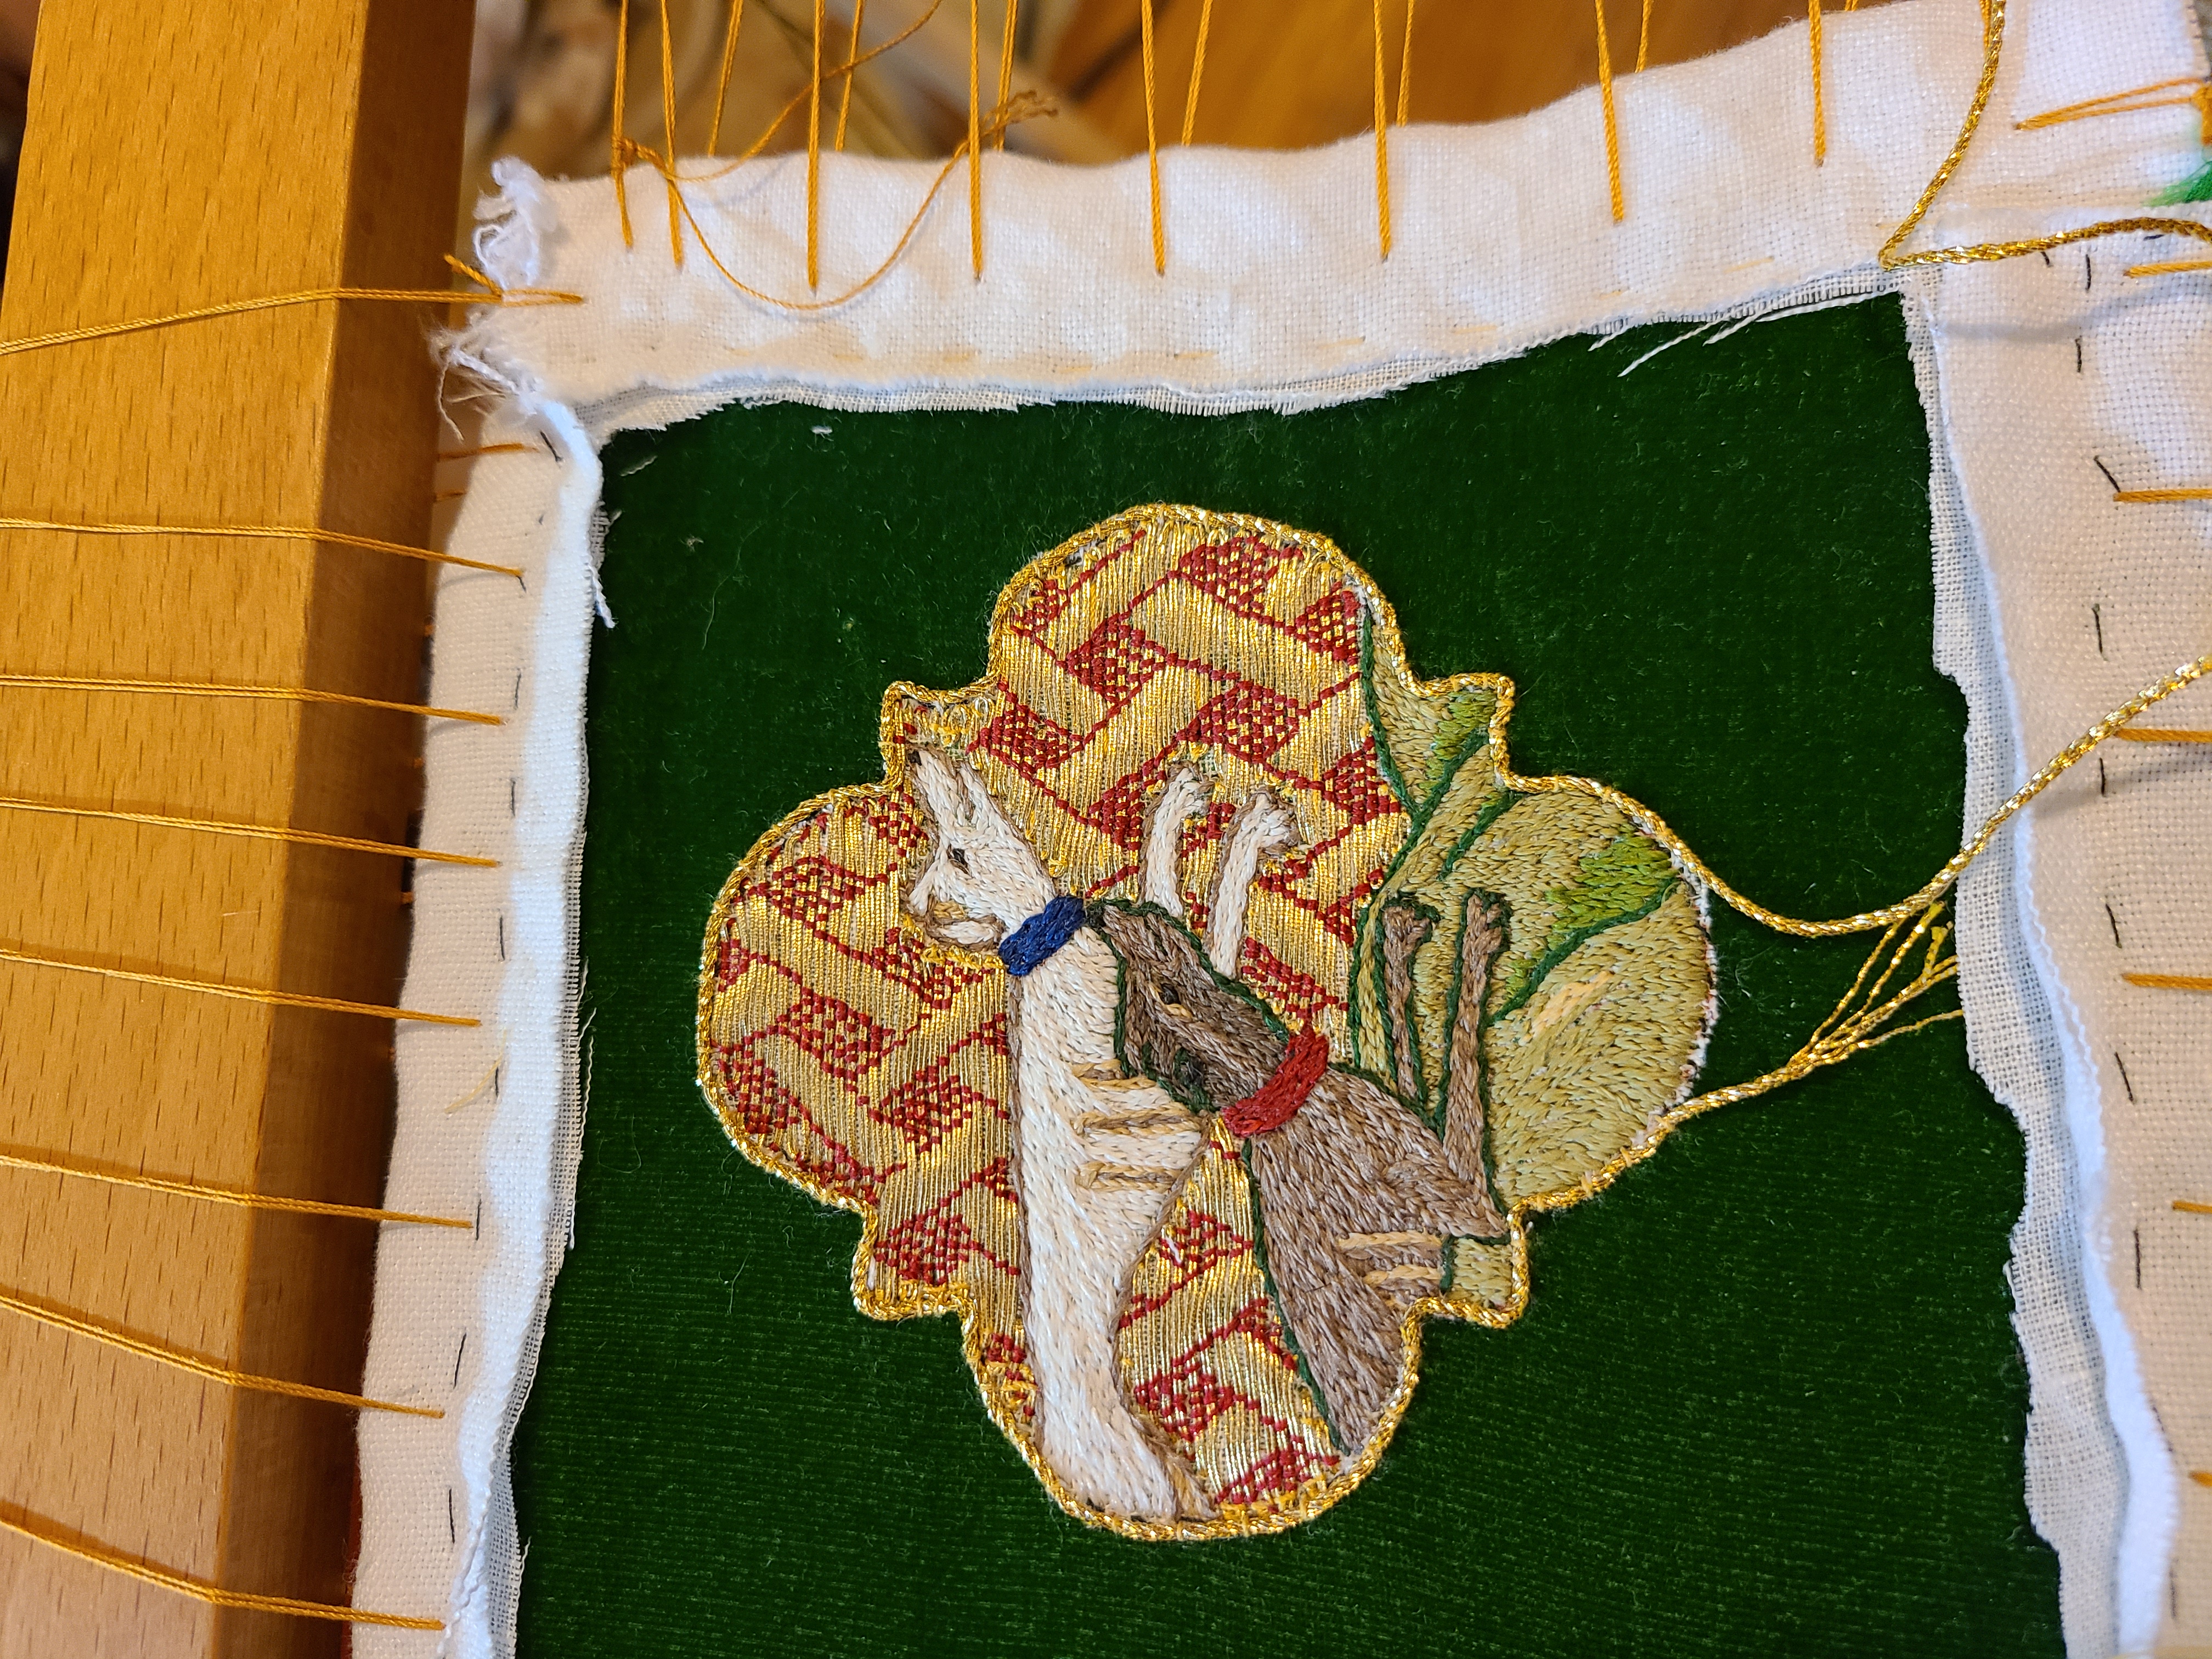
To begin stitching I first completed one more basting line on the inside of the quatrefoil, which would eventually be covered completely by the gold and the silk threads. This to make certain the fabric did not move with velvet pile under the linen. The dogs were filled in with split stitch in silk thread, using a flat silk. The outlining around the dogs was done in stem stitch.
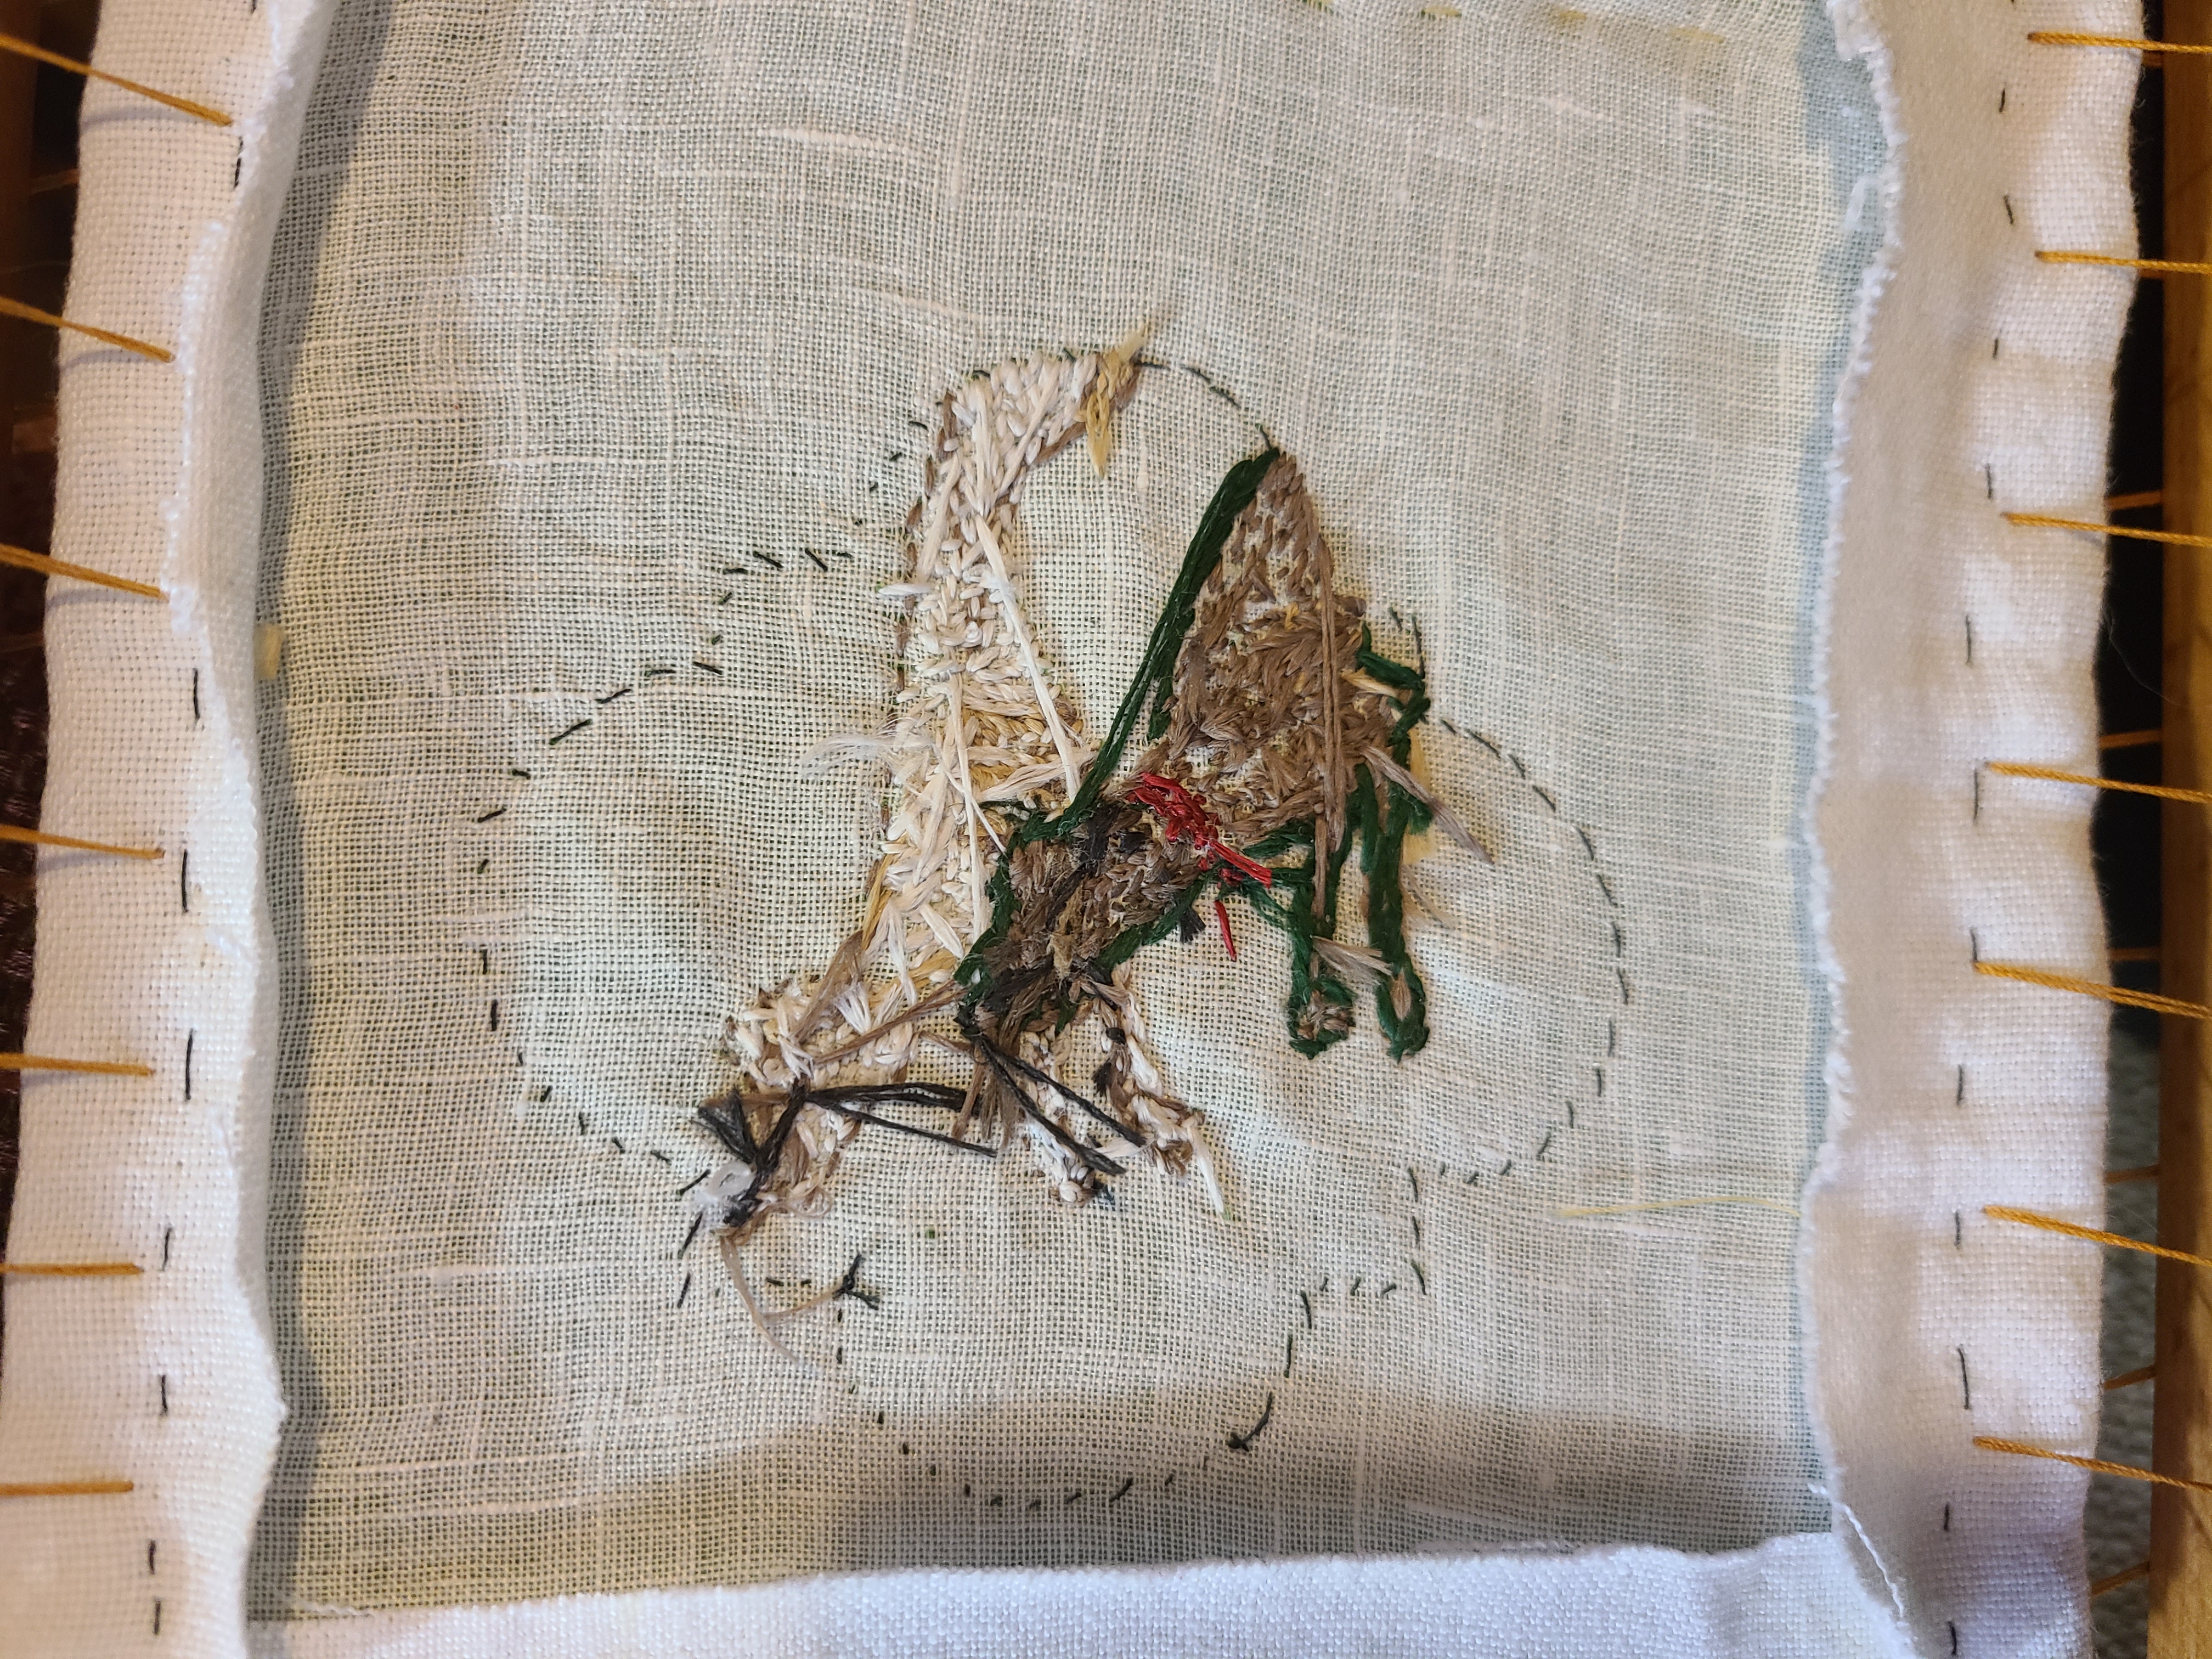
The back side of the silk thread split stitch work

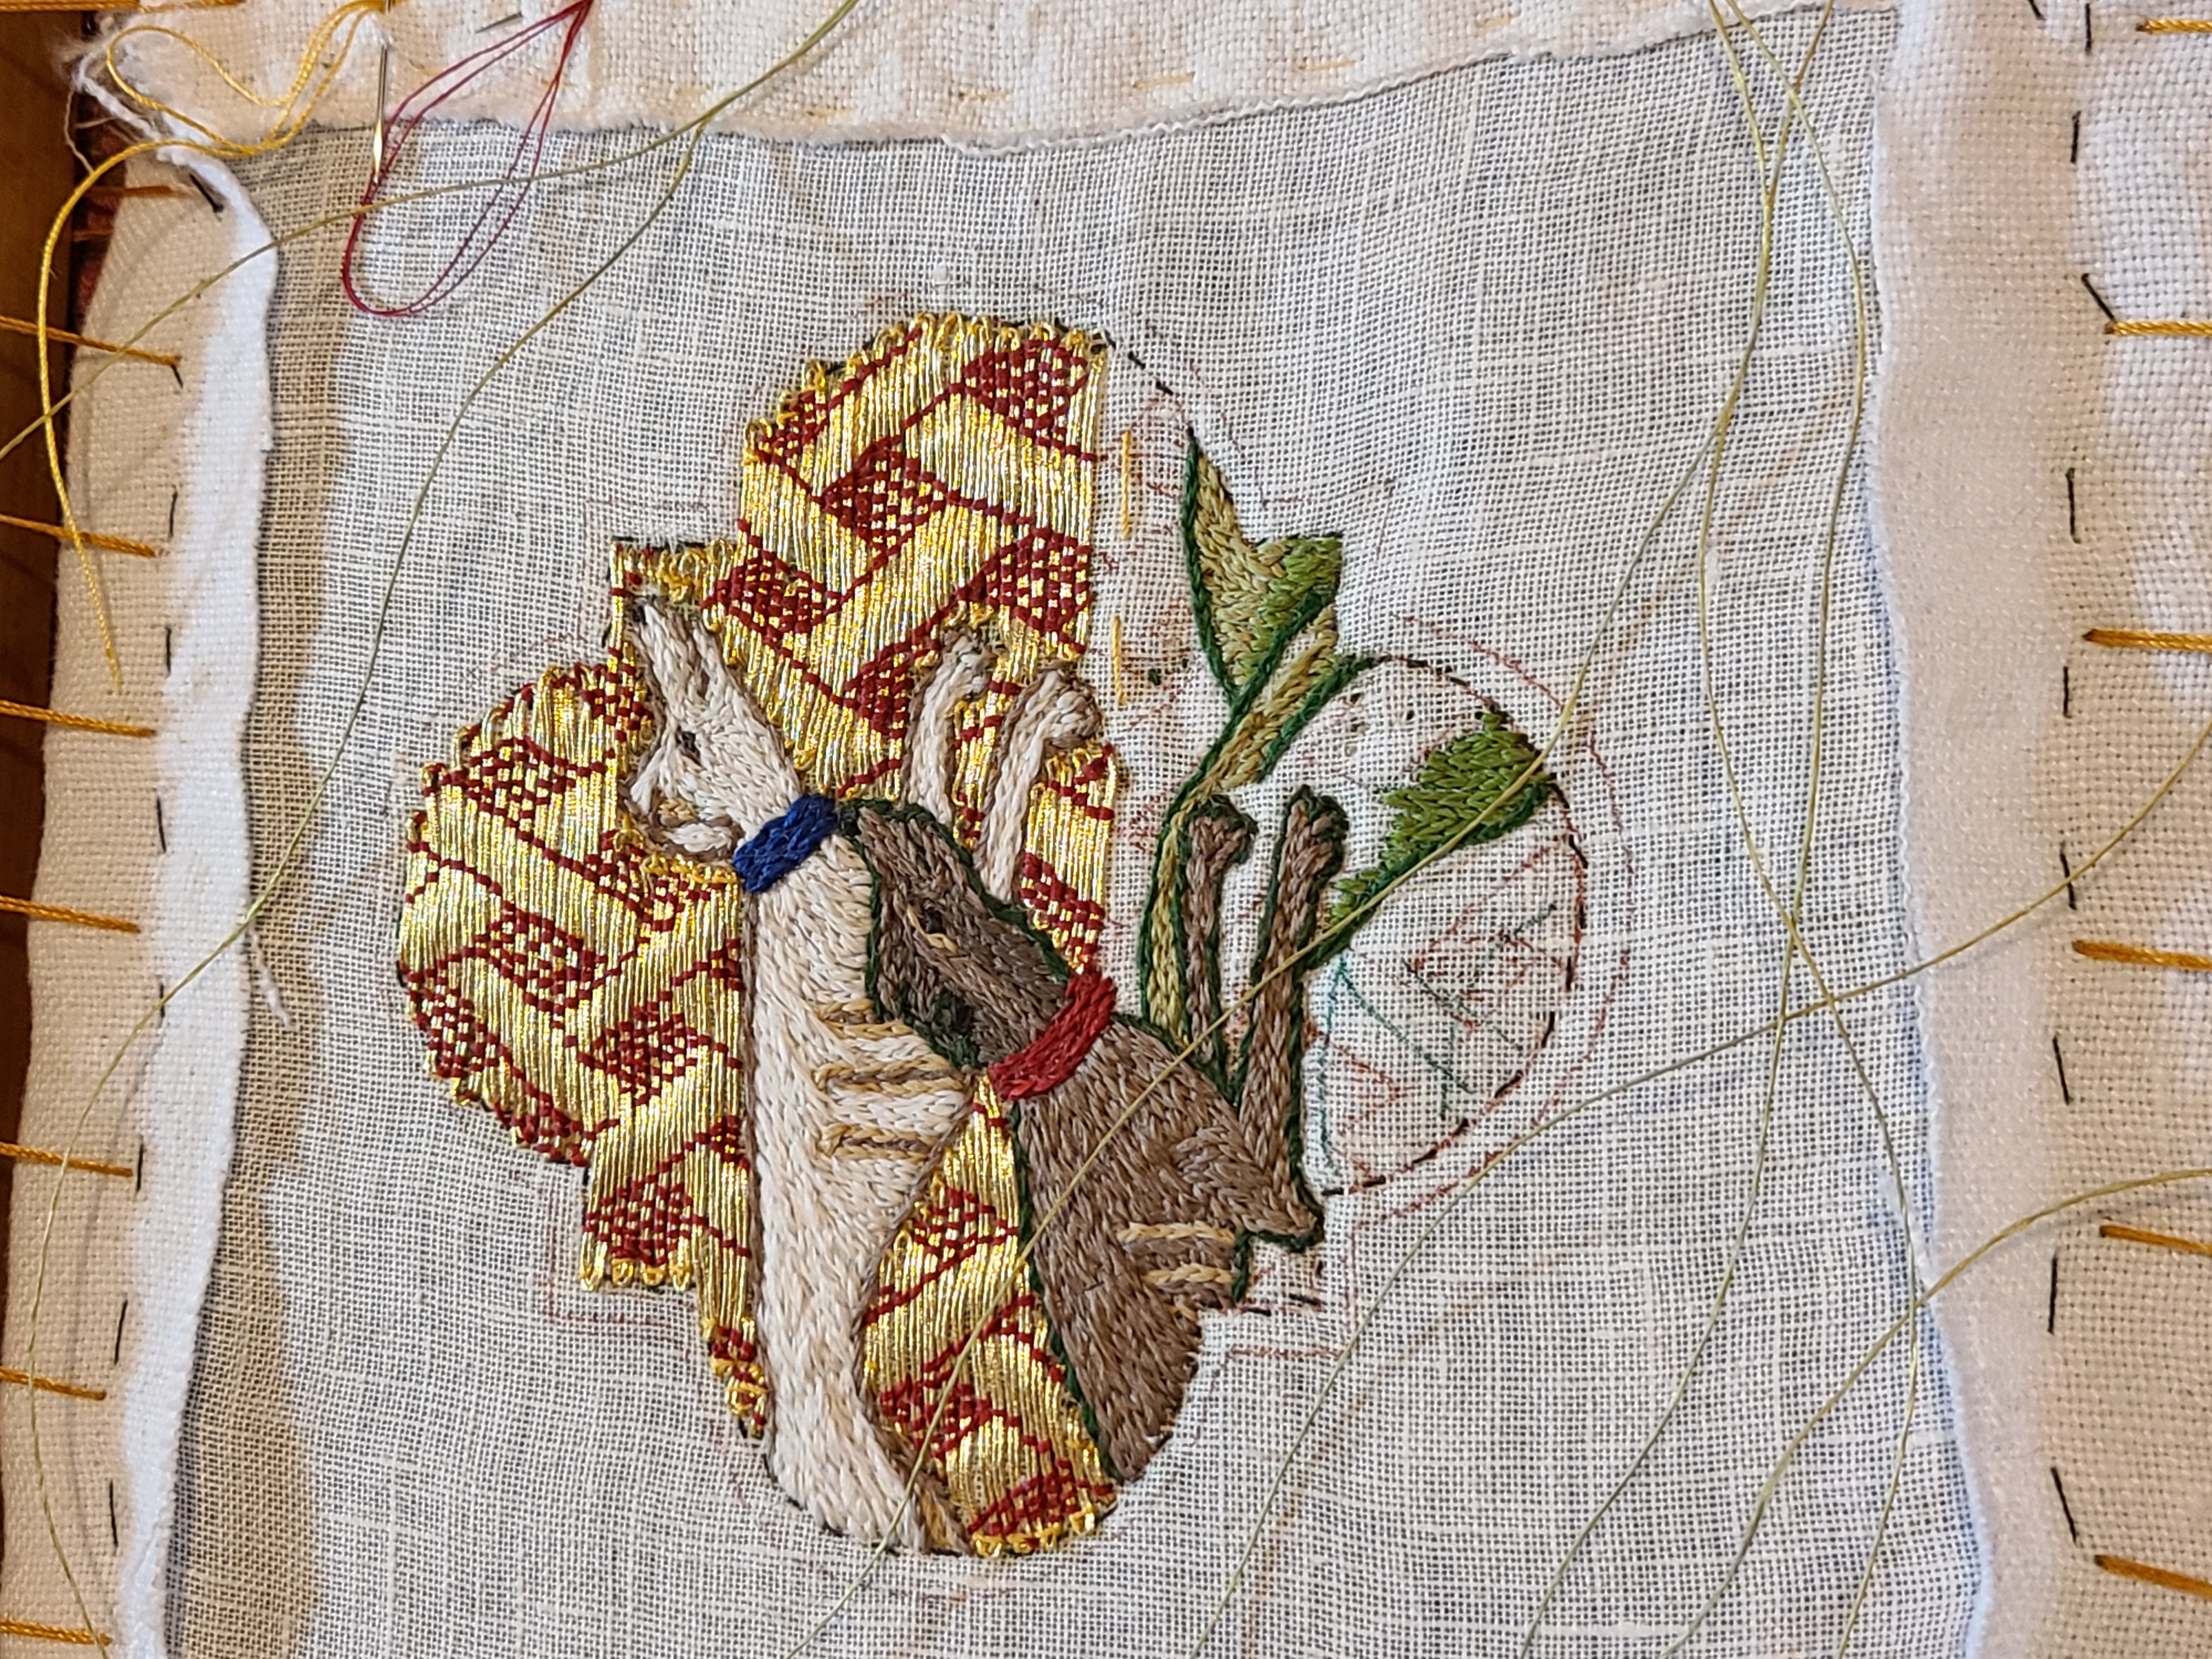
Working the gold thread couching. You can see a yellow guide thread I used to try to keep the gold threads straight.
At this point, I began to think the design would look better if there were greenery, so rolling hills were added as green hills below the dogs, continuing in split stitch and following the lines of the hills to create the effect of rolling hills.
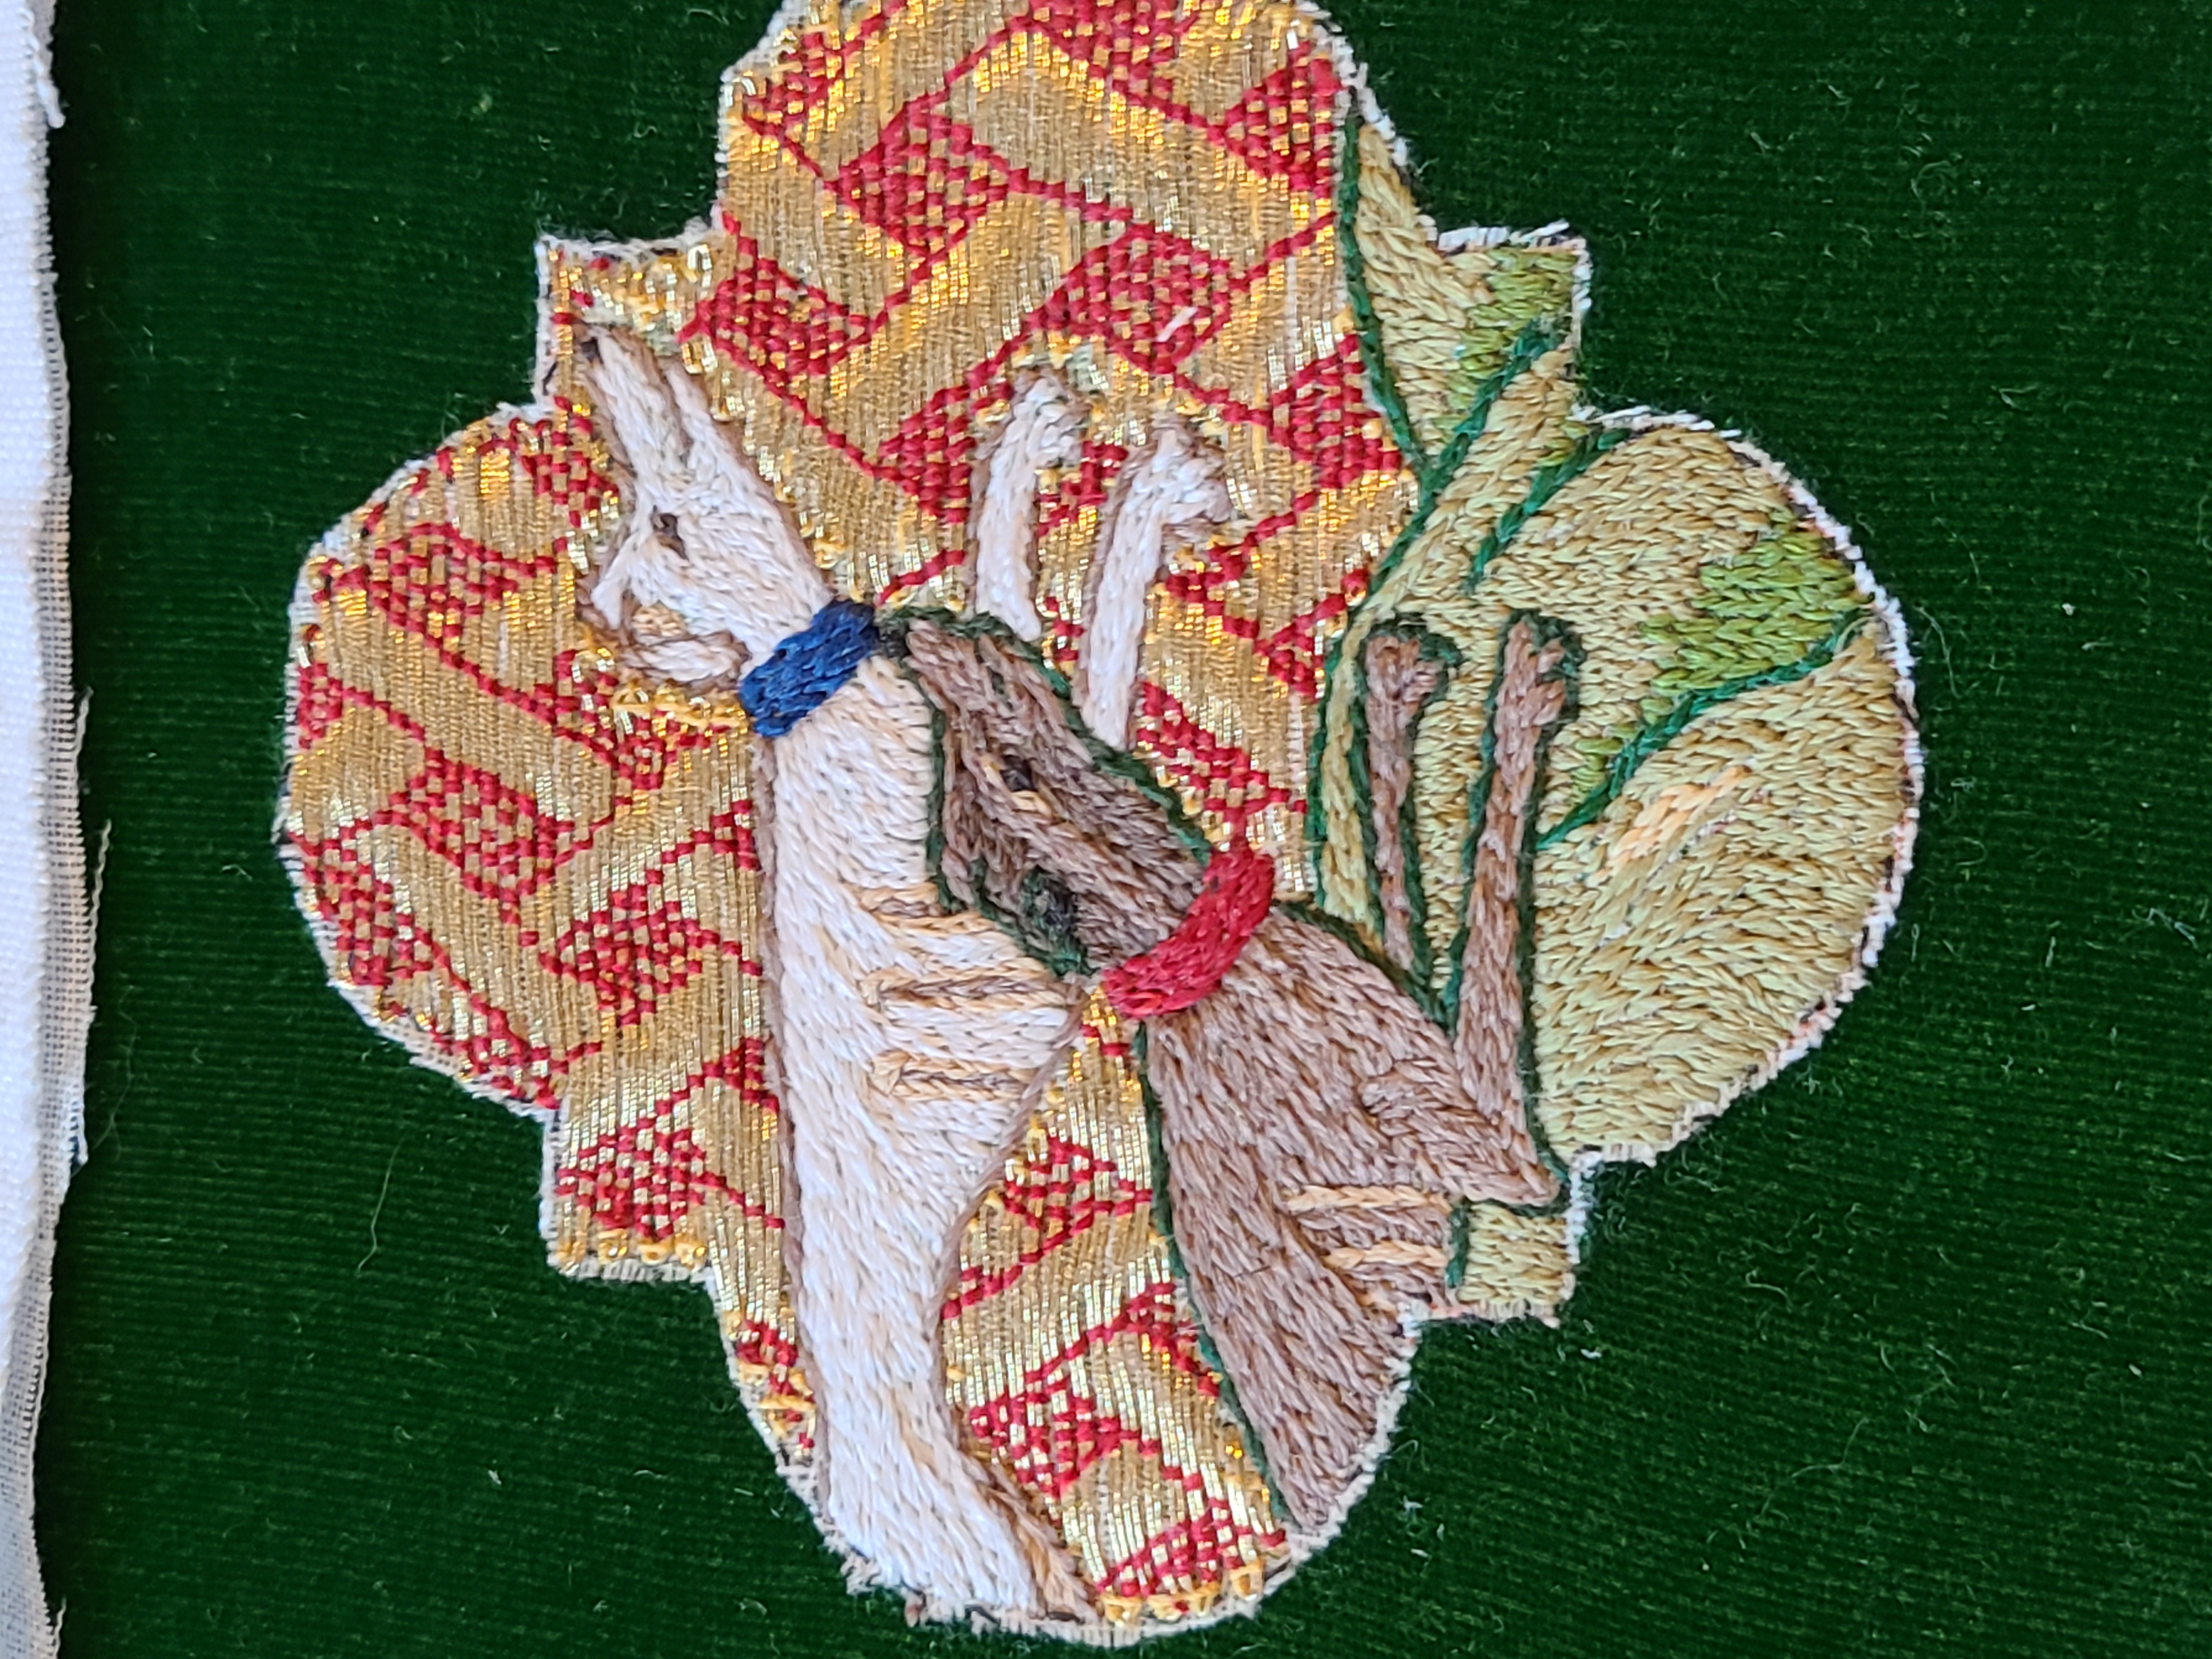
Once the embroidery is complete, the linen on the surface of the velvet (the piece with the design on it) is cut away, close to the edge of the embroidery.
Gold cord is couched around the embroidery.
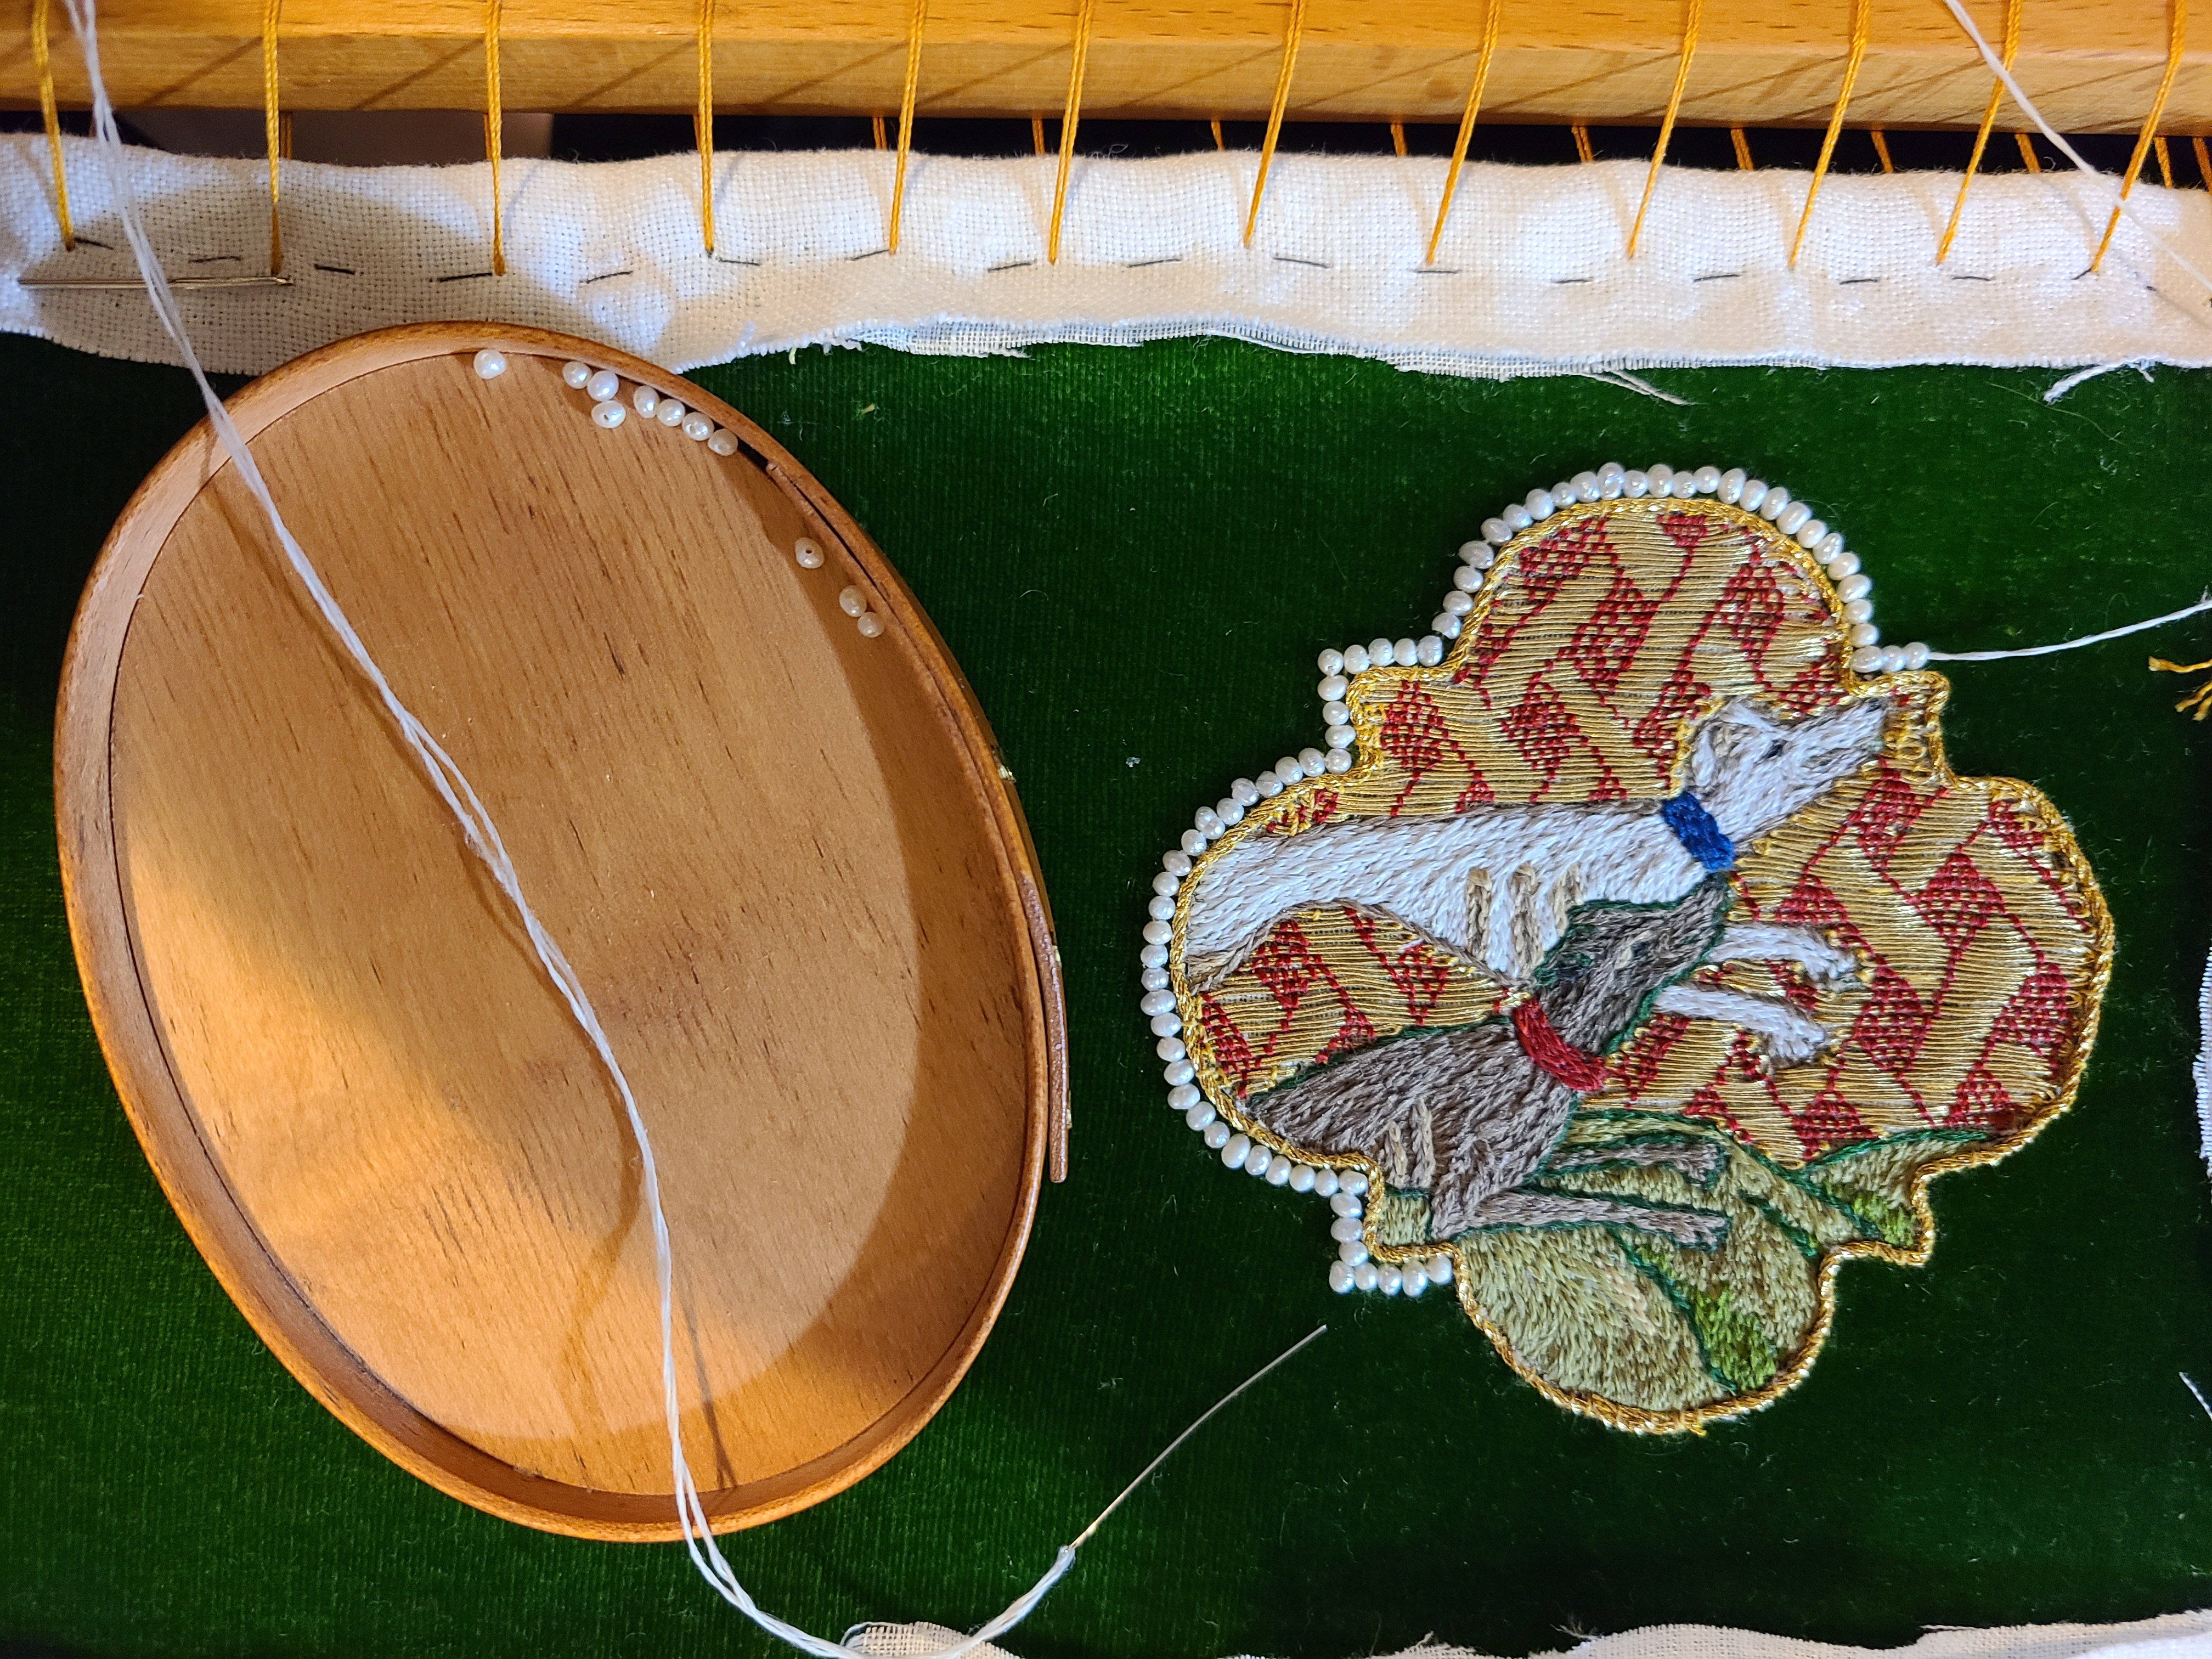
Couching seed pearls around embroidery.
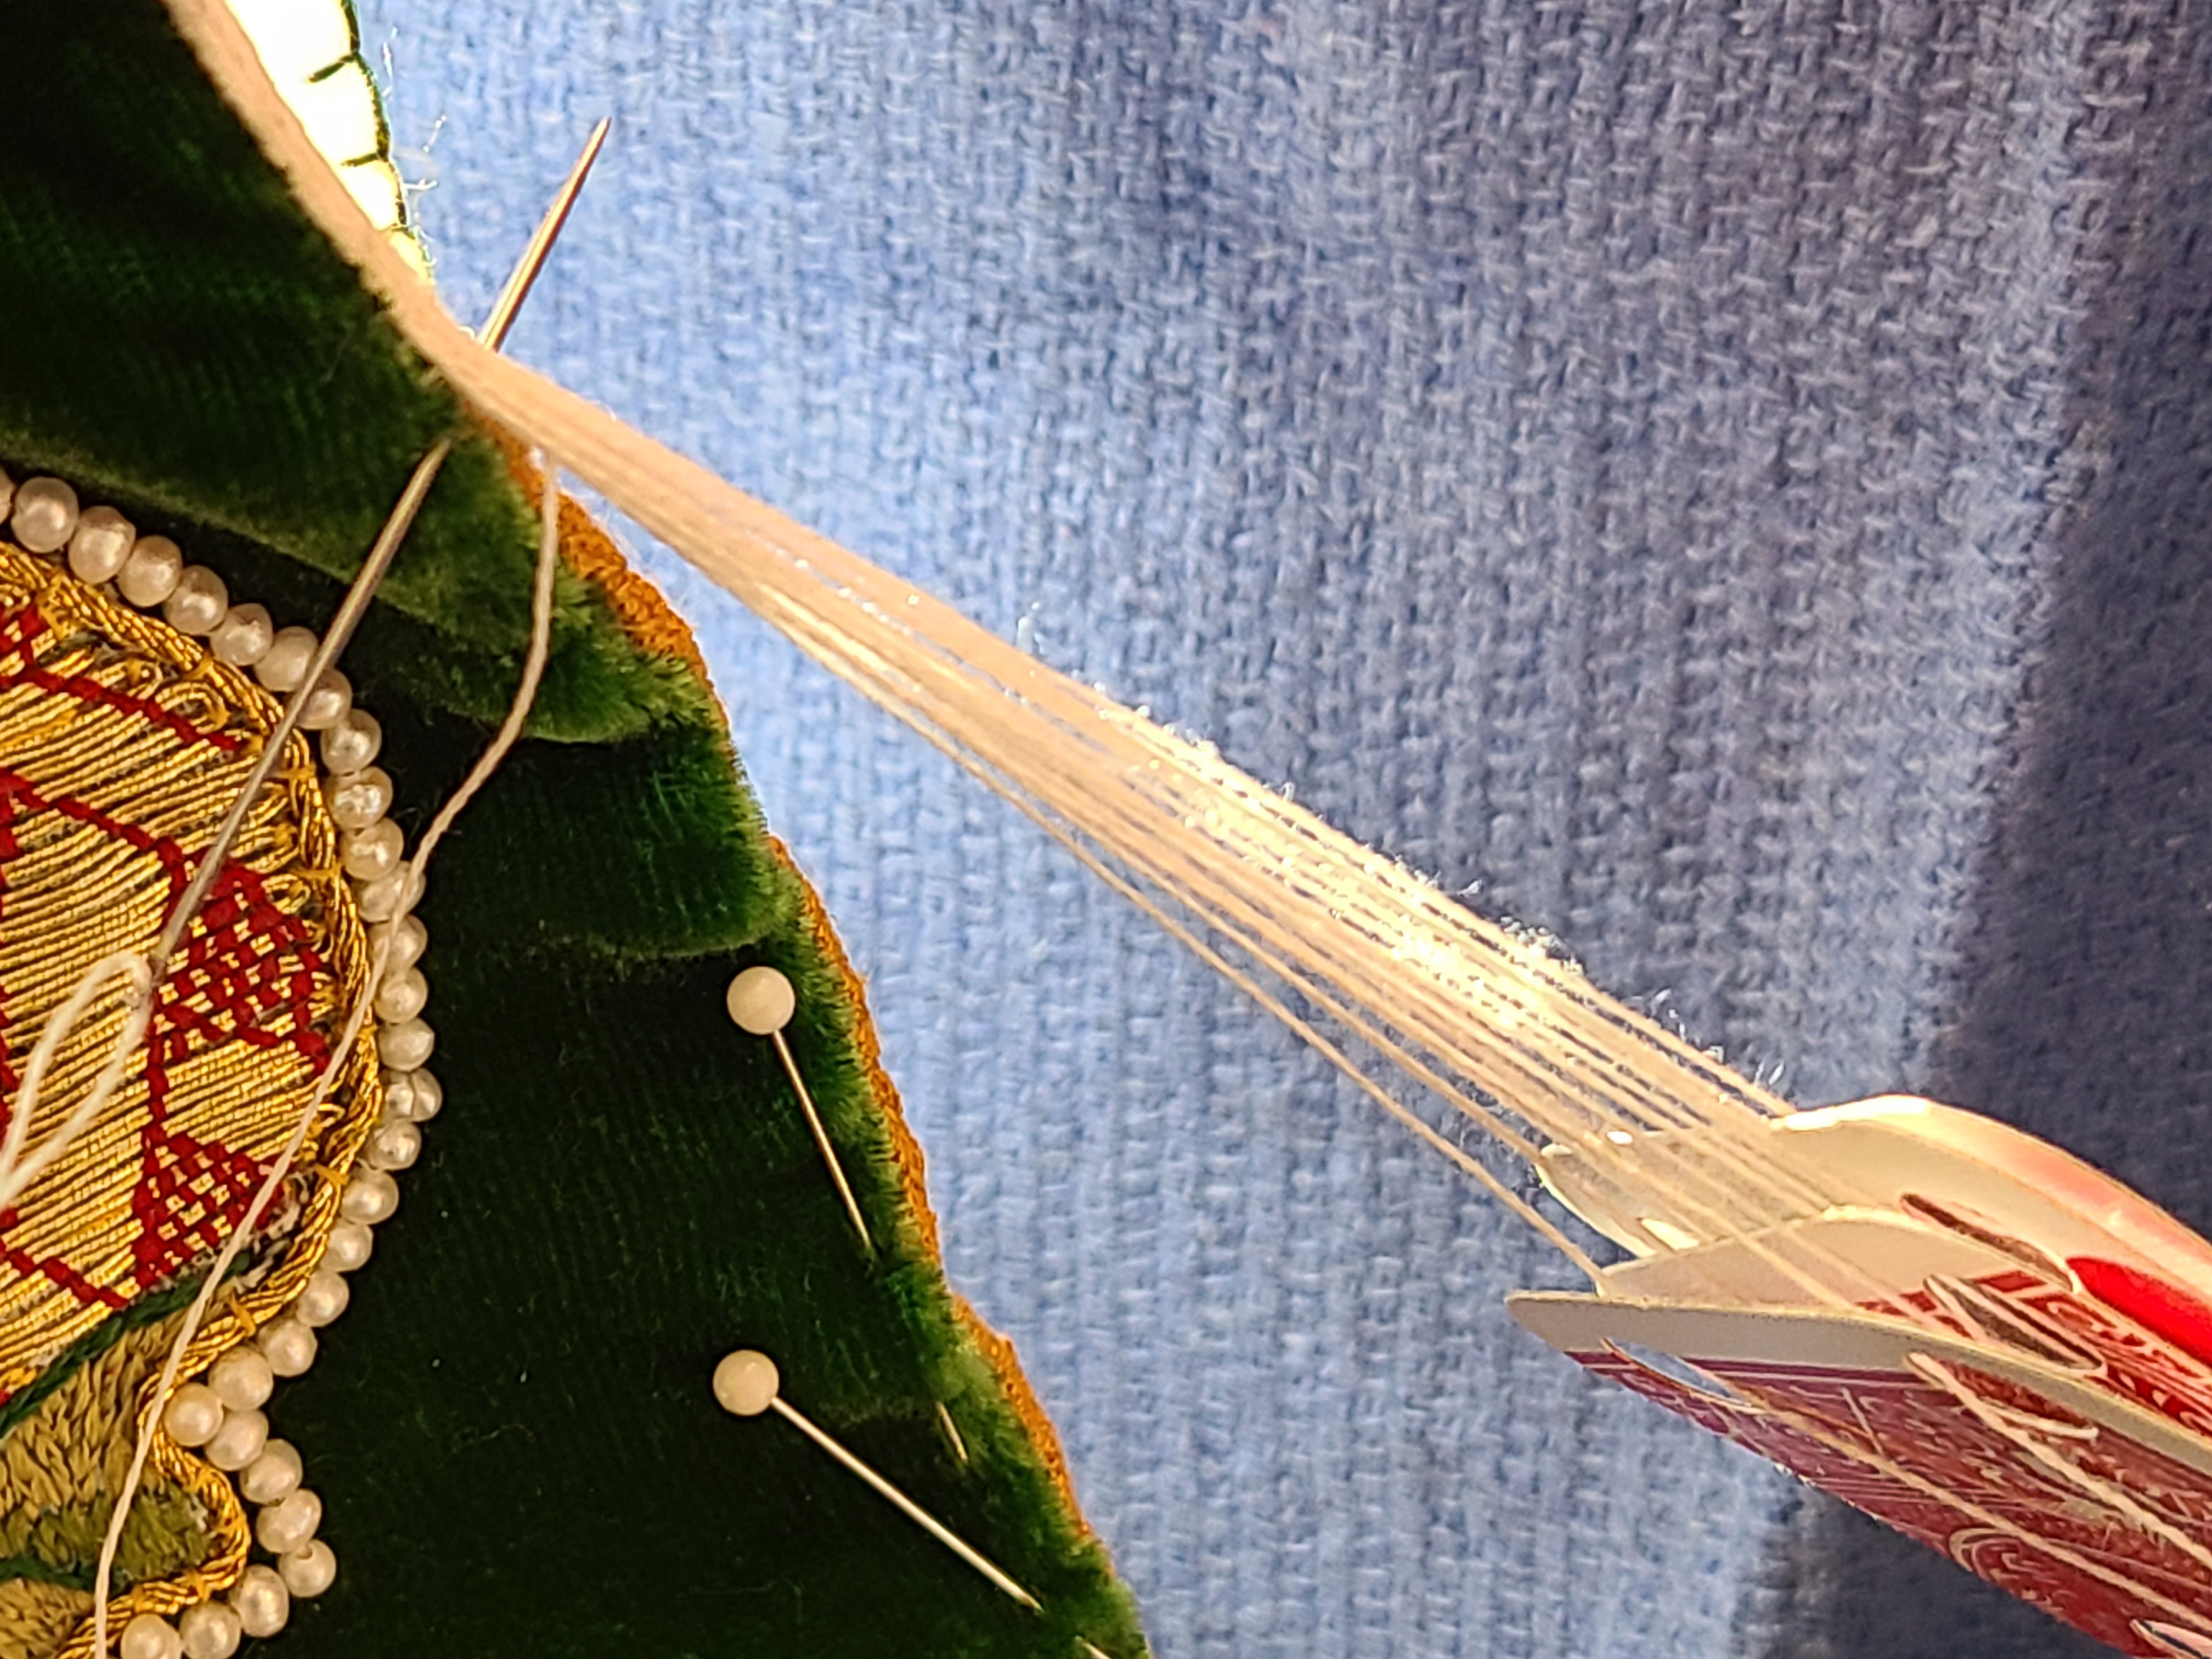
After the embroidery was complete and the fabric was removed from the frame, the linen lining was sewn into the book cover, and the edge was tablet woven with 4 cards white silk. Tablet weaving was common on pouches. Book covers more frequently had cord couched around the edge. I chose this method because it is stronger, and will stand up better to use.
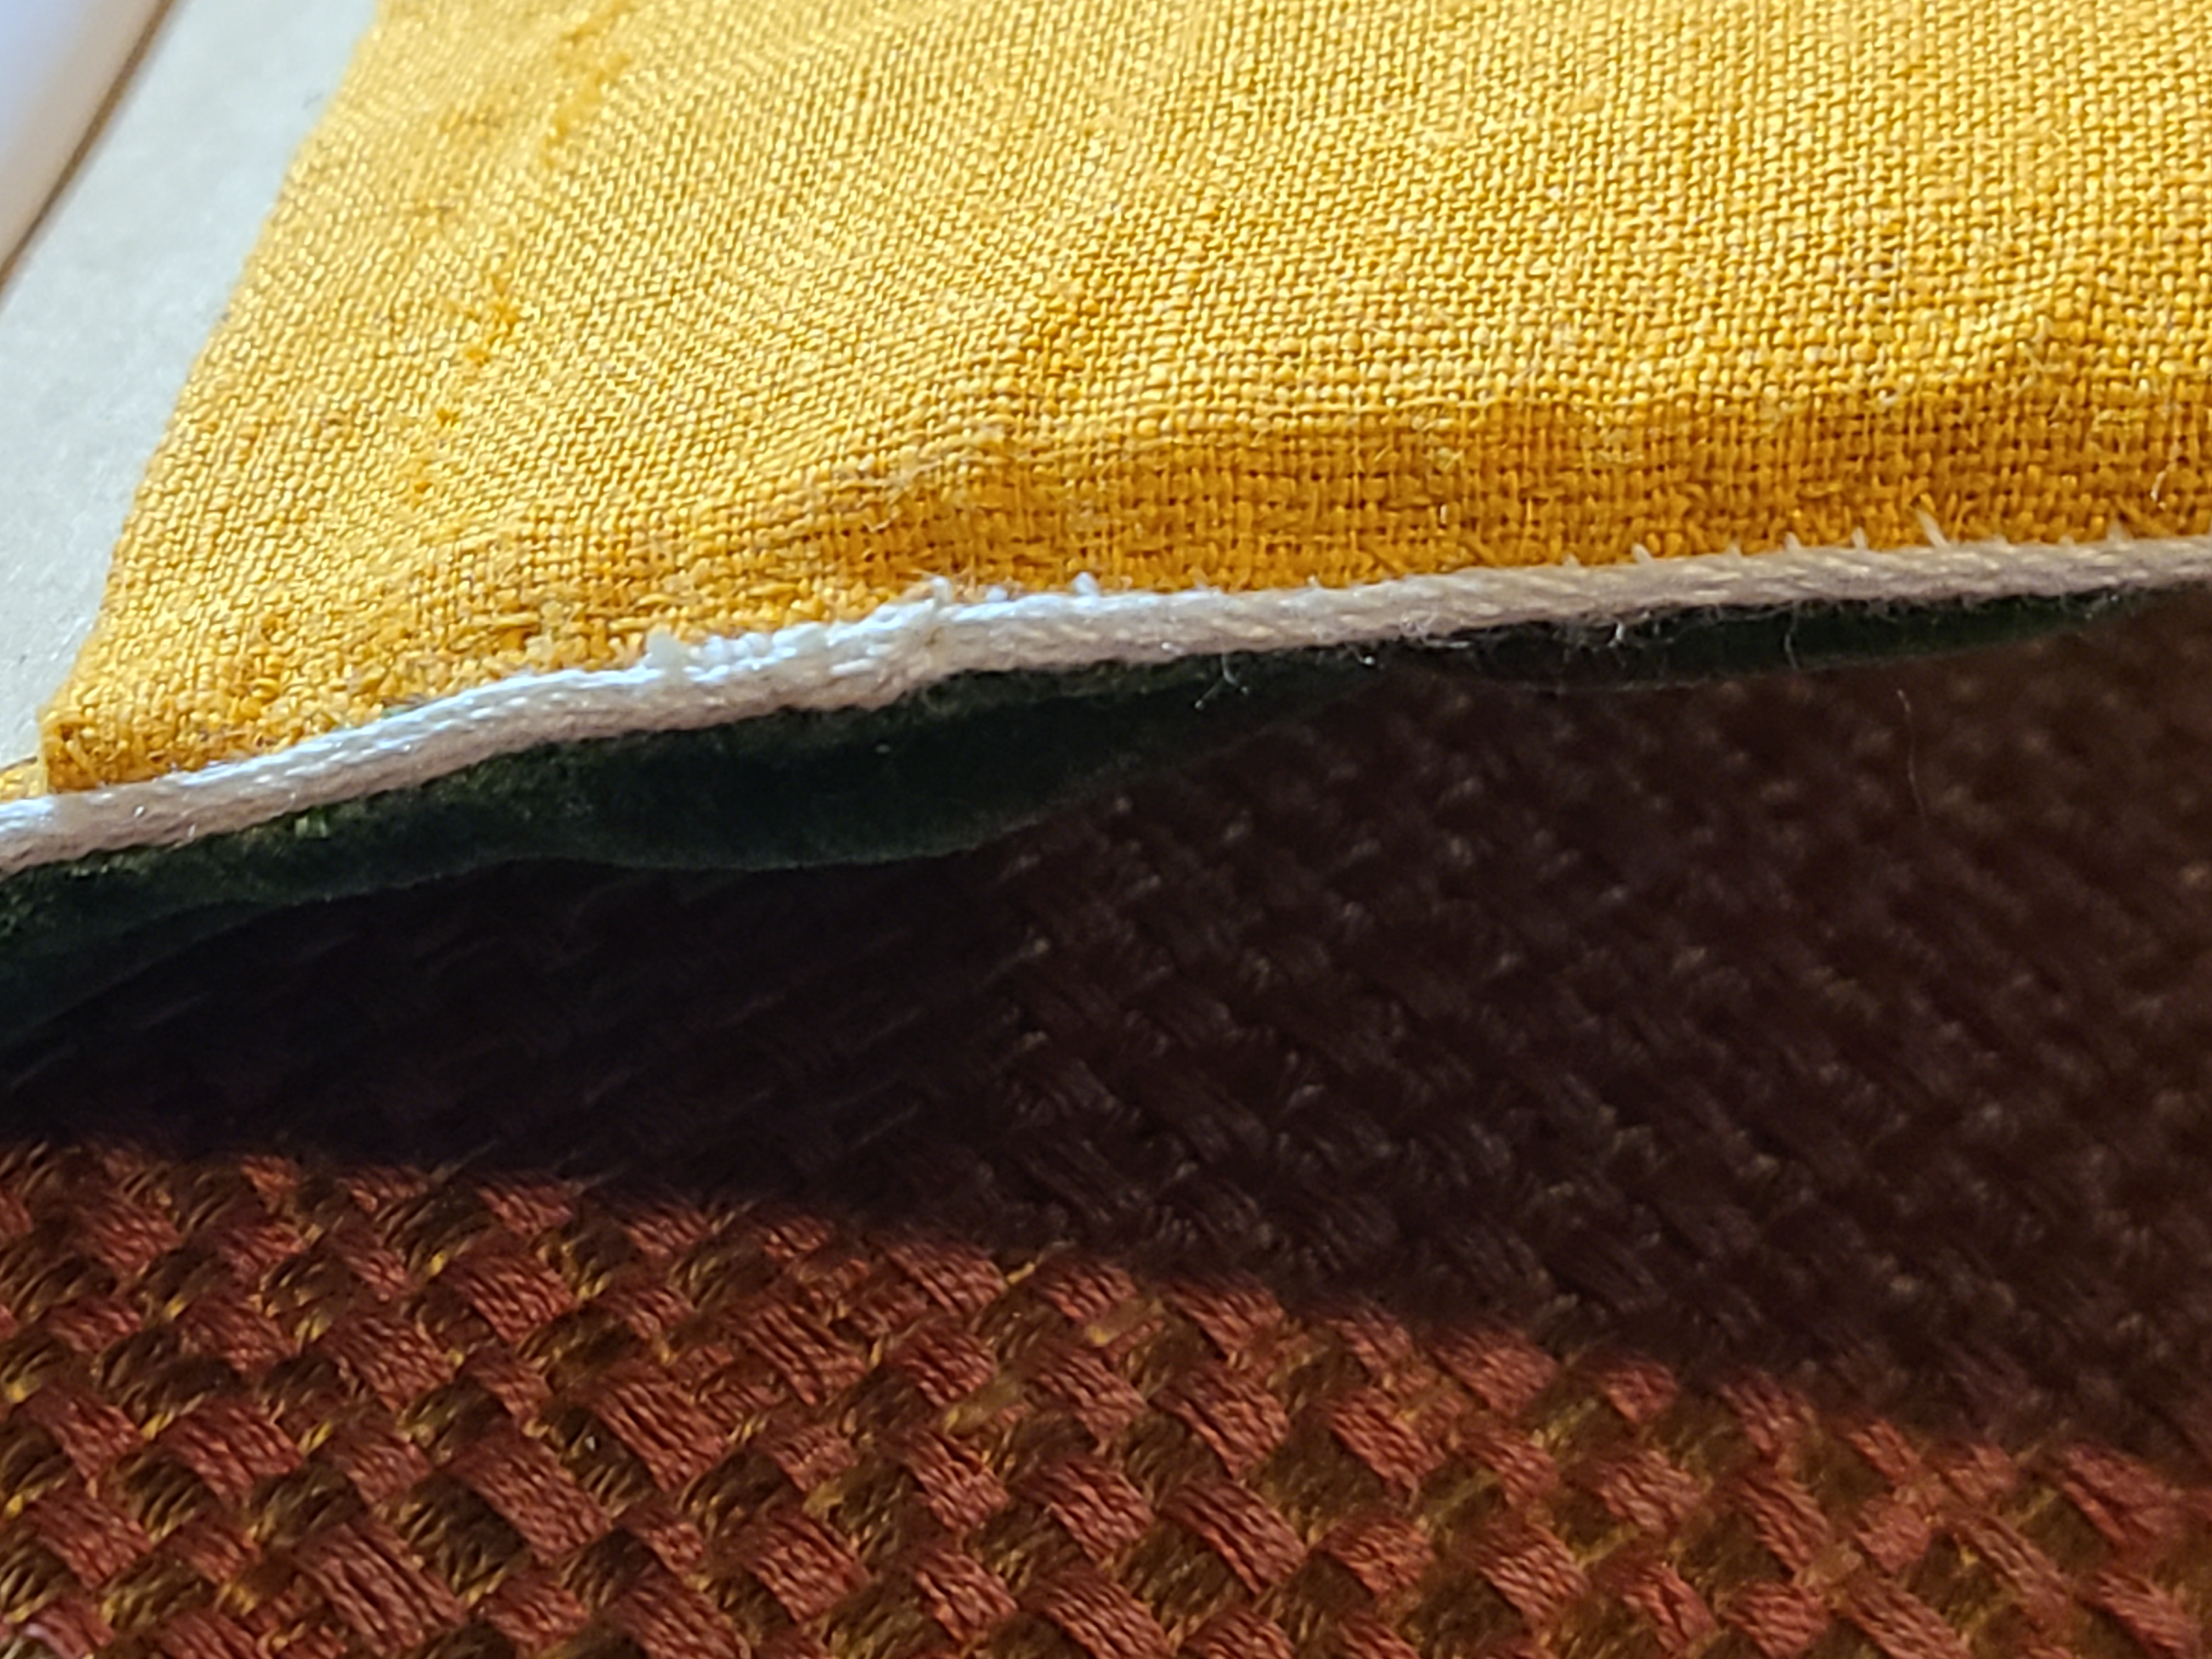
In the center of this picture, you can see the join of the beginning and end of the tablet weaving
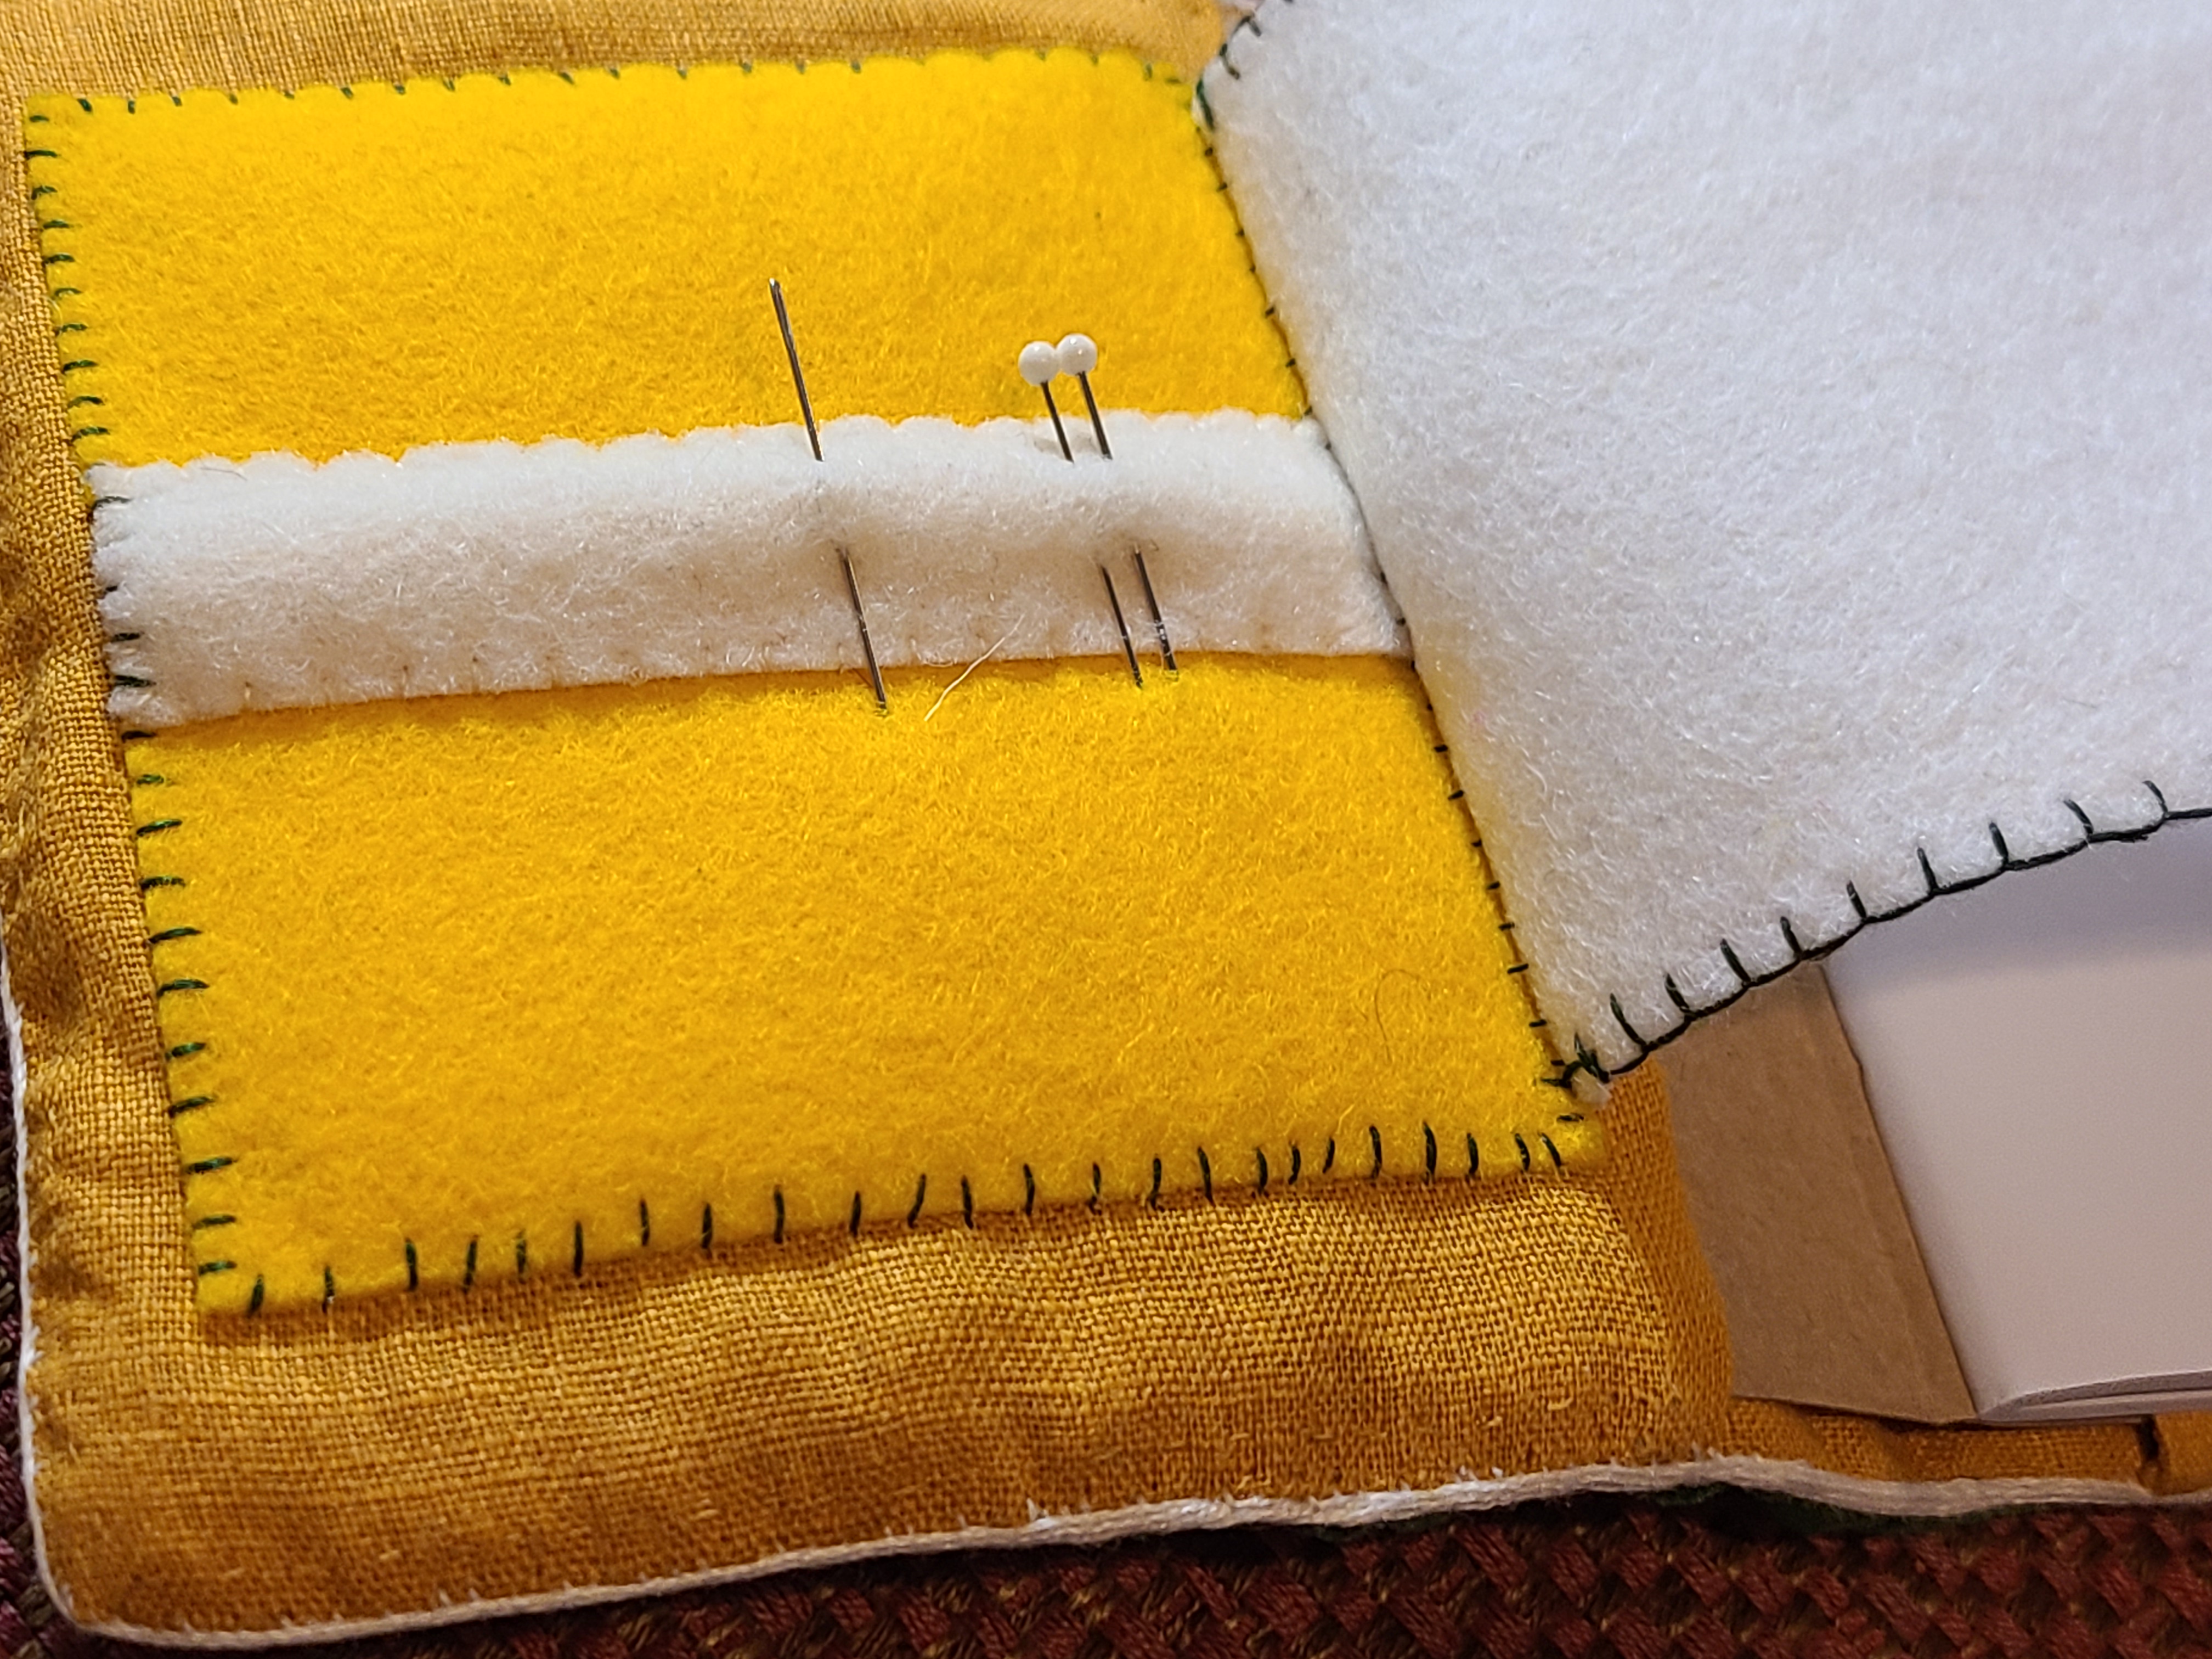
After all the other parts were done, the needlebook portion was added. This is 100% wool felt with blanket stitch to finish the edge.
Thoughts now that the project is finished: I was not attempting to make a period item, but I did want to make the embroidery portion of it as close to period as possible. I did use modern sewing needles, scissors, and modern means to transfer the design. I would like to do another project in the future where I explore medieval techniques for transferring designs, and use a handmade medieval style needle. I enjoyed using the embroidery frame, the fabric remained stable without needing to readjust, however it was a fair amount of effort to secure the fabric to the frame. Other than the modern items I’ve mentioned, I tried to stay as close to what is known about these embroideries. There were three layers of fabric, which was common when velvet was used. The metal passing thread was similar in size and function to what was used in period. It would nice to find 100% silk velvet that I could be sure of the fiber content. I tend to think that because I could afford this fabric that it was likely not 100% silk, though that was how it was sold. I did both bleach and burn test it, and it is at least made of a natural fiber. Overall I enjoyed this project, and I really hope the recipient likes it as well! 🙂
Bibliography:
Browne, Clare Woodthorpe, Glyn Davies, M. A. Michael, and Michaela Zöschg. English Medieval Embroidery: Opus Anglicanum. New Haven: Yale UP, 2016. Print.
Cennini, Cennino. “10. Milanesi.” Notebook. Web. 22 Feb. 2021.
Hémiole. “Reconstitutions.” A Vos Marques, Prêts, Brodez ! – Reconstitutions. 20 Nov. 2009. Web. 22 Feb. 2021.
Meffre, Bénédicte. “History of the Embroidery Frames.” Le Temps De Broder. 11 Nov. 2020. Web. 22 Feb. 2021.
Owen-Crocker, Gale R., Elizabeth Coatsworth, and Maria Hayward. Encyclopedia of Dress and Textiles in the British Isles C. 450-1450. Leiden: Brill, 2012. Print.
Staniland, Kay. Medieval Craftsmen: Embroiderers. London: British Museum, 1994. Print.